Venison, the lean and flavorful meat from deer, has been a prized protein for centuries. Unlike commercial meats, wild venison offers a unique taste and exceptional nutritional benefits—but it requires special handling to bring out its best qualities. This guide offers you just what you need.
Whether you’re a hunter processing your own harvest or a home cook exploring new ingredients, this comprehensive guide will walk you through selecting, preparing, and cooking venison to perfection.
Why Choose Venison?
Before diving into preparation methods, let’s examine why venison deserves a spot in your kitchen:
- Lean & Nutritious: With 50% less fat than beef but higher protein and iron content, venison is a powerhouse of nutrition.
- Sustainable Choice: Wild deer are free-range, grass-fed, and free from antibiotics or hormones.
- Rich, Earthy Flavor: When handled properly, venison offers a deep, robust taste that stands out in any dish.
Now, let’s explore how to make the most of this exceptional meat.
1. Selecting High-Quality Venison
The journey to perfect venison starts at the source.
Field Dressing & Aging
Proper field dressing is crucial. Gut the deer as soon as possible to prevent bacterial growth and spoilage. Many hunters swear by hanging the carcass for 3–7 days in a cool environment (34–40°F / 1–4°C) to enhance tenderness and flavor.
Evaluating the Meat
- Color: Fresh venison should be deep red, not brown or gray.
- Smell: It should have a clean, slightly sweet aroma—avoid any sour or off odors.
- Texture: Younger deer (fawns or yearlings) yield more tender meat than older bucks.
Pro Tip: If purchasing from a butcher, ask about the deer’s age and how it was processed.
2. Proper Storage & Handling
Venison’s low fat content makes it prone to drying out, so proper storage is key.
Refrigeration & Freezing
- Short-Term Storage: Keep fresh cuts refrigerated below 40°F (4°C) and use within 2–3 days.
- Freezing: For long-term storage, vacuum-seal portions to prevent freezer burn. If using freezer paper, wrap tightly and label with dates.
- Thawing: Always thaw slowly in the refrigerator—never at room temperature.
Avoid Refreezing: Once thawed, cook venison immediately for the best texture.
3. Preparing Venison for Cooking
Trimming & Cleaning
- Remove Silver Skin: The thin, silvery membrane on cuts like backstrap can be tough if left on.
- Trim Excess Fat: Unlike beef, deer fat doesn’t render well and can taste gamey.
Tenderizing Techniques
- Marinating: Acidic ingredients like red wine, vinegar, or citrus juices help break down muscle fibers.
- Brining: A saltwater soak (or buttermilk bath) can reduce gaminess and improve moisture retention.
- Mechanical Tenderizing: For tougher cuts, use a meat mallet or Jaccard tenderizer.

4. Best Cooking Methods for Venison
Because venison is so lean, the wrong cooking method can leave it dry and tough. Here’s how to cook it perfectly.
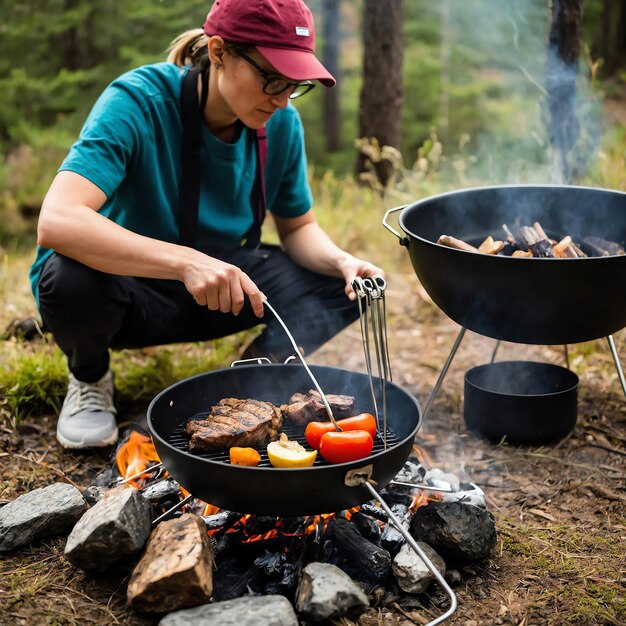
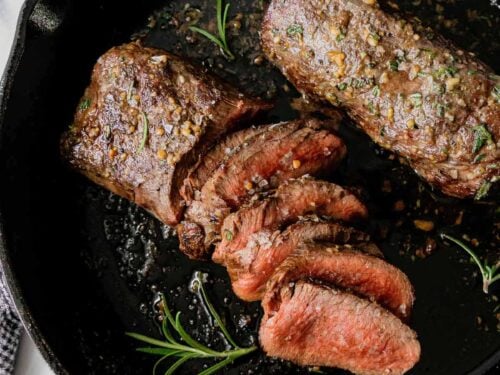
Grilling & Searing (Best for Tender Cuts)
- Ideal Cuts: Backstrap, tenderloin, or rib chops.
- Method: Sear over high heat to medium-rare (130–140°F / 54–60°C).
- Pro Tip: Baste with butter or olive oil to prevent drying.
Slow Cooking & Braising (Best for Tough Cuts)
- Ideal Cuts: Shanks, shoulder, or neck.
- Method: Cook low and slow in broth, wine, or beer until fork-tender.
- Recipe Idea: Try a classic venison stew with root vegetables and herbs.
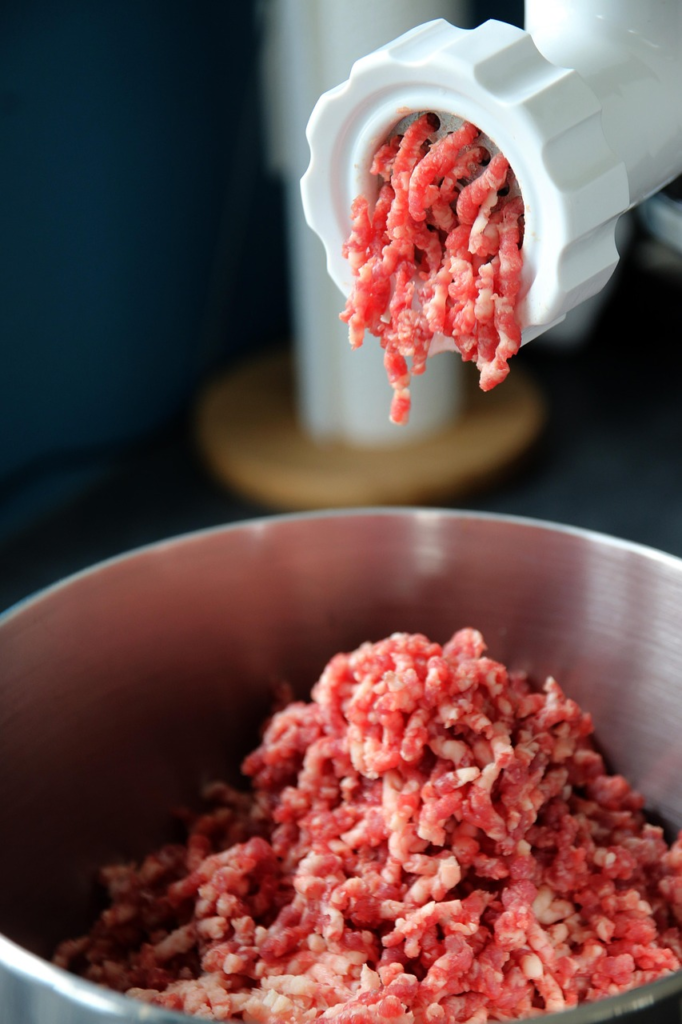
Ground Venison (Versatile & Easy)
- Mix with Fat: Blend with 10–20% pork or beef fat for juicy burgers or meatloaf.
- Recipe Ideas: Tacos, chili, or Bolognese sauce.
5. Flavor Pairings & Serving Suggestions
Venison’s rich flavor pairs beautifully with bold, earthy, and aromatic ingredients.
Best Herbs & Spices
- Rosemary, thyme, sage
- Juniper berries, black pepper, garlic
- Red wine, mustard, balsamic glaze
Side Dishes to Complement Venison
- Creamy mashed potatoes
- Roasted Brussels sprouts
- Wild rice pilaf
- Cranberry sauce
Final Thoughts
Venison is a rewarding meat to work with—once you master the basics. By selecting high-quality cuts, storing them properly, and cooking with care, you’ll unlock its full potential.
Want to take it further? Experiment with smoking venison, making jerky, or trying global recipes like venison curry or stir-fry.
Have a favorite venison dish? Share your tips in the comments below!
]]>
Deer hunting is a time-honored tradition for many, providing not only a rewarding outdoor experience but also a sustainable source of lean, protein-rich meat. Once you’ve harvested your deer, preserving the meat is essential to ensure it stays fresh and flavorful for months to come. While freezing is a popular option, canning deer meat is an excellent alternative that saves freezer space and provides ready-to-eat meals with a long shelf life. In this guide, we’ll walk you through a safe and simple method for canning deer meat at home.
Why Can Deer Meat?
Canning deer meat offers several advantages:
- Long-Term Storage: Properly canned meat can last for up to a year or more, making it a great option for stocking your pantry.
- Convenience: Canned deer meat is fully cooked and ready to use in soups, stews, casseroles, or even as a standalone dish.
- Space-Saving: Unlike freezing, canning doesn’t require valuable freezer space.
- Flavor Retention: Canning preserves the natural flavor and tenderness of the meat, often enhancing it with the addition of broths or seasonings.
Safety First: The Importance of Proper Canning Techniques
Canning meat requires careful attention to safety to prevent the growth of harmful bacteria, such as Clostridium botulinum, which can cause botulism. To ensure safety, always use a pressure canner when canning meat. Unlike water bath canning, which is suitable for high-acid foods like fruits and pickles, pressure canning reaches the high temperatures necessary to safely preserve low-acid foods like meat.
What You’ll Need

Before you begin, gather the following supplies:
- A pressure canner
- Canning jars (quart or pint-sized) with lids and bands
- A jar lifter and canning funnel
- A sharp knife and cutting board
- Deer meat (trimmed of fat and connective tissue)
- Salt (optional, for flavor)
- Broth or water (for packing the jars)
- A clean workspace and clean towels
Step-by-Step Guide to Canning Deer Meat
Step 1: Prepare the Meat
Start by trimming the deer meat of any excess fat, sinew, or connective tissue. Fat can become rancid over time, so it’s important to remove as much as possible. Cut the meat into chunks, strips, or cubes, depending on your preference. Some people prefer to brown the meat lightly in a skillet before canning, but this is optional.
Step 2: Sterilize the Jars and Lids
Wash your canning jars, lids, and bands in hot, soapy water, then rinse thoroughly. Place the jars in a pot of boiling water or run them through a dishwasher cycle to sterilize them. Keep the jars hot until you’re ready to fill them.
Step 3: Pack the Jars
Using a canning funnel, pack the prepared deer meat into the sterilized jars. Leave about 1 inch of headspace at the top of each jar to allow for expansion during processing. You can add a pinch of salt to each jar for flavor, if desired. Then, fill the jars with boiling water, broth, or tomato juice, maintaining the 1-inch headspace.
Step 4: Remove Air Bubbles
After filling the jars, use a non-metallic utensil (like a plastic spatula) to remove any air bubbles by gently pressing along the sides of the jar. Wipe the rims of the jars with a clean, damp cloth to ensure a proper seal.
Step 5: Secure the Lids
Place the sterilized lids on the jars and screw on the bands until they are fingertip-tight. Avoid over-tightening, as this can prevent air from escaping during processing.
Step 6: Process in the Pressure Canner
Place the filled jars in the pressure canner, following the manufacturer’s instructions for your specific model. Add the recommended amount of water to the canner, then lock the lid in place. Process the jars at the appropriate pressure for your altitude:
- 10 pounds of pressure for altitudes of 0–1,000 feet.
- 15 pounds of pressure for altitudes above 1,000 feet.
Process pint jars for 75 minutes and quart jars for 90 minutes. Adjust the processing time if you’re using a weighted-gauge canner.
Step 7: Cool and Store
Once the processing time is complete, turn off the heat and allow the pressure canner to cool naturally. Do not force-cool the canner, as this can cause the jars to break. When the pressure has fully released, carefully remove the jars using a jar lifter and place them on a towel-lined surface to cool. As the jars cool, you’ll hear the satisfying “ping” of the lids sealing.
After 12–24 hours, check the seals by pressing down on the center of each lid. If the lid doesn’t flex, the jar is sealed. Store any unsealed jars in the refrigerator and consume them within a few days. Label the sealed jars with the date and contents, then store them in a cool, dark place.
Tips for Success
- Use Fresh Meat: Always can fresh, high-quality deer meat for the best results.
- Follow Guidelines: Stick to tested recipes and processing times to ensure safety.
- Rotate Your Stock: Use the oldest jars first to maintain freshness.
- Experiment with Flavors: Add herbs, spices, or vegetables to the jars for variety.
Enjoying Your Canned Deer Meat
Canned deer meat is incredibly versatile. Use it in hearty stews, savory pies, or even as a quick protein boost for salads. The meat’s tender texture and rich flavor make it a favorite for campfire meals or emergency food supplies.
Final Thoughts
Canning deer meat at home is a practical and rewarding way to preserve your harvest. By following these simple steps and prioritizing safety, you can enjoy the fruits of your hunting efforts all year round. Whether you’re a seasoned canner or a beginner, this method is a great way to make the most of your deer meat and reduce food waste. Happy canning!
]]>
If you’re a hunter or just a home cook looking for new flavors, this guide is for you. It covers how to cook tender venison stew, what sides to serve, and drinks to pair it with. You’ll learn everything from prep tips to slow cooker hacks, making every bite feel like a gourmet meal.
Introduction to Cooking with Venison
Venison, or deer meat, is a bold and nutritious choice. It’s perfect for hearty dishes like stew, blending rich flavors with health benefits. Let’s see why it’s a great addition to your kitchen.
The Unique Benefits of Deer Meat
Deer meat has less fat than beef, with 50% less. It’s also wild-raised, so it doesn’t have added hormones. This makes it a clean protein option. Its strong flavor works well with bold herbs, adding depth without too much sodium.
What Makes Deer Stew Special
Venison cooking shines in slow-cooked stews. The long simmer makes the meat tender. Herbs and vegetables in the stew enhance its taste, softening any gamey notes. This method makes a dish that’s both comforting and complex.
Nutritional Profile of Venison
Venison has fewer calories than beef per serving, with 30% less. It’s high in iron and B vitamins, which fuel energy and muscle recovery. A 3-ounce serving has 5 grams of protein and only 3 grams of fat, making it a smart choice for health-focused meals.
Essential Ingredients for the Perfect Deer Stew
Creating a great venison stew starts with the right mix of proteins, veggies, and seasonings. Use fresh venison shoulder or stew cuts as the base. These cuts get tender in slow cooking. Add classic veggies like carrots, onions, and celery for depth.
Aromatic herbs like thyme and rosemary bring earthy flavors. Red wine or beef broth make the broth richer.
Seasonings are key in deer stew. Bay leaves and black pepper add warmth. Juniper berries or smoked paprika add complexity.
For a citrus touch, try orange zest or brandy.A good venison marinade tenderizes the meat. Use acidic ingredients like vinegar or citrus juice. Oil keeps the meat moist. Try a marinade of olive oil, red wine vinegar, garlic, and rosemary. Marinate for 4–6 hours before cooking.
Preparing Your Venison for Stew
Learning how to prepare venison is key to a delicious stew. Choose cuts like shoulder or shank for slow-cooked dishes. Make sure to remove excess fat and silverskin to avoid tough textures.
Cut the meat into 1-inch cubes for even cooking. This step is crucial for a tender stew.
Properly Cleaning and Cutting Deer Meat
Use sharp knives to separate muscle from connective tissue. Freezing the meat briefly helps in trimming fat. Store the cut pieces in airtight containers for easy access later.
Marinating Techniques to Remove Gamey Flavor
Acidic marinades can get rid of the gamey taste. Try these marinade combinations:
- Buttermilk + garlic: Soak 8–12 hours
- Red wine + rosemary: Marinate 6 hours
- Yogurt + lemon zest: 4 hours minimum
Always refrigerate and discard leftover marinade before cooking. This helps remove gamey flavor.
Tenderizing Methods for Tough Cuts
For really tough cuts, try these steps:
- Mechanical: Pound with a meat mallet to break fibers
- Enzymatic: Coat in pineapple or papaya puree for 2 hours
Combine these methods with slow cooking for tender results. A pro tip: Prepare cuts a few days ahead and freeze for convenience.
Classic Deer Stew Recipes That Never Disappoint
Hunters and home cooks have made venison stew recipes for generations. These dishes celebrate the season’s bounty. Let’s look at three timeless classics from American cooking.

Traditional American Venison Stew
This traditional venison stew mixes tender venison with root vegetables. Simmer cubed meat with carrots, celery, and onions in a savory broth. Add thyme and bay leaves for extra warmth. Serve with crusty bread for a satisfying meal.
Hearty Midwestern Deer Stew
This American deer stew uses beer to tenderize the venison. Marinate the meat in amber beer, then sauté with diced potatoes, bell peppers, and celery. Simmer until the meat is tender. Finish with fresh parsley.
International Twists on Deer Stew Recipes
Take your cooking to new heights with international venison recipes. These dishes mix global tastes with venison’s deep flavor. You’ll find everything from European classics to North African twists.
- French Venison Bourguignon: Deer cubes are braised in red wine with onions and mushrooms. Enjoy with crusty bread for a true ethnic venison dishes favorite.
- Italian Venison Ragù: This stew is slow-cooked with tomatoes, rosemary, and red wine. It’s best with creamy polenta or pappardelle pasta.
- Hungarian Goulash: A stew with paprika, caraway seeds, onions, and potatoes. It brings the flavors of Budapest right to your table.
- Moroccan-Style Tagine: Venison is cooked with prunes, cinnamon, and cumin. It’s topped with cilantro for a sweet and spicy touch.
These international venison recipes show how global flavors can elevate deer meat. From European stews to North African tagines, venison adapts well. Try these global deer stew ideas to make unique dishes without complex techniques. Start with spices, then add more flavors. Even with limited ingredients, your pantry can help fill in the gaps.
Slow Cooker and Instant Pot Venison Stew Methods
Busy kitchens need easy venison stew options. You can choose from slow cooking, pressure cooking, or Dutch oven methods. Each offers a unique way to enjoy a delicious meal.

“Patience and pressure both turn venison into melt-in-your-mouth perfection.” — Chef Maria Rivera
Overnight Slow Cooker Deer Stew
Great for those who love to set it and forget it. Marinate the venison in broth and spices overnight. In the morning, add veggies and potatoes, then cook on low for 8 hours.
Tip: Add root vegetables last to prevent mushiness.
- Marinate venison 8+ hours before slow cooking
- Add carrots, celery, and thyme at start
- Check tenderness after 6 hours; add greens last 30 mins
Quick and Easy Instant Pot Deer Stew
Instant Pot deer stew makes tough cuts tender in 45 minutes. Sear the meat first, then cook with veggies under pressure. Use natural pressure release for tender results.
Pressure cook on high for 35 mins, quick release for veggies, natural release for meat
One-Pot Dutch Oven Recipe
Dutch ovens are great for building deep flavors. Brown the meat in the pot, then simmer uncovered to concentrate the flavors. Use cast iron for even heat.
Serve with crusty bread to soak up the rich broth.
Pair with garlic bread and a side salad for a complete meal.
Seasonal Variations to Enhance Your Deer Stew
Make deer stew a year-round treat with seasonal venison recipes. Each season brings new flavors to enjoy. This turns every stew into a celebration of the harvest.
Winter Comfort Deer Stew
Beat the cold with winter venison stew. It has barley and wild mushrooms. Simmer it for rich flavors. Keep root veggies cool for winter.
Spring Herb-Infused Recipe
Spring brings freshness to deer stew. Add chives, parsley, and snap peas. Lighten the broth with citrus for a refreshing touch.
Best Side Dishes to Serve with Deer Stew
Make every bite of your venison stew special with sides that match its flavors and textures. Whether you’re serving big portions or having a small dinner, these sides make the meal a feast for the taste buds.
Classic choices like crusty bread, creamy mashed potatoes, or buttered rice are great with deer stew. These staples absorb the stew’s rich flavors, letting the venison’s taste shine.
- Crusty artisan bread – Dampen with stew juices for a rustic touch.
- Roasted root vegetables – Carrots, parsnips, and onions add earthy sweetness.
- Polenta or grits – Creamy bases for drizzling extra broth.
For something different, try sides like sweet potato mash with cinnamon or quinoa pilaf. A tangy green salad with citrus vinaigrette adds a refreshing touch. Spätzle pairs well with German stews, while cornbread is perfect for Southern-style stews.
Try a quick garlic bread recipe: Mix minced garlic, olive oil, and rosemary. Brush it on baguette slices, then bake at 375°F for 10 minutes. Serve warm for a delicious finish.
Wine and Beer Pairings for Venison Stew
Finding the perfect drink for venison stew can make every bite better. Let’s look at some great options that match its bold taste.
Red Wine Recommendations
Rich red wines complement venison’s earthy flavor. Choose medium to full-bodied wines:
- 2020 Paso Robles Syrah – It has bold berry notes that match the stew’s herbs.
- Argentinian Malbec from Mendoza – It has smooth tannins that won’t fight with spices.
- California Zinfandel blends – Affordable choices like Bogle Vineyards cost $15-$20.
Craft Beer Selections
Beer lovers will enjoy malty or roasted styles:
- Belgian Rochefort 6 – It has dark fruit flavors that pair well with savory meat.
- Founders Breakfast Stout – It has coffee and chocolate notes that contrast with gamey flavors.
- Left Hand Milk Stout – Its creamy texture goes well with hearty stews.
Non-Alcoholic Options
Try these flavorful drinks:
- Unsweetened cranberry juice – Its tartness cuts through the stew’s richness.
- Juniper berry iced tea – It’s a refreshing twist with herbal notes.
- Boylan’s Root Beer – Its spiced sweetness mimics the stew’s herbs.
Experiment with these drinks to find your favorite. Whether you prefer wine or beer, the right drink makes the meal unforgettable.
Troubleshooting Common Deer Stew Problems
Even the most skilled cooks can face challenges when making deer stew. Here are some easy fixes for common issues:
- Fix Tough Venison Stew: If the meat is chewy, it might be overcooked or not tender enough. Try simmering tougher cuts in a slow cooker or Dutch oven for longer. If the meat is already cooked, blend some broth into it to make it softer.
- Deer Stew Too Gamey: Venison can be too strong if not balanced right. Adding a bit of apple cider vinegar or diced apple can help. A little soy sauce or smoked paprika can also enhance other flavors.
- Thin Broth: To thicken the broth, simmer it uncovered to reduce the liquid. Or, mix a cornstarch slurry (1 Tbsp cornstarch + 2 Tbsp water) to thicken it instantly.
- Greasy Surface: Remove excess fat by skimming it off with a ladle or paper towel. Strain the broth through a fine-mesh sieve before serving to get rid of any remaining fat.
- Overcooked Vegetables: To prevent veggies from getting mushy, cut them into larger pieces. This way, they cook slower than the meat. Add quick-cooking greens like spinach towards the end.
Still having trouble? Don’t worry, you can still make something delicious out of imperfect stew. Turn dry stew into a casserole with mashed potatoes or tortillas. Or, blend the meat into a hearty soup. With a little creativity, you can turn any mishap into a tasty meal!
Conclusion
Exploring the best deer stew recipes opens a world of hearty, nutritious meals. You can start with traditional American or Southern-style dishes. Or, you can try international flavors. The tips shared here will help you succeed.
Proper preparation, like marinating and tenderizing, keeps the meat tender. Slow cookers or Instant Pots make it easy to cook at home.
Seasonal twists let you enjoy homemade venison stew all year. Try fall harvest versions or spring herb-infused batches. Pair stews with sides, wines, or craft beers for a perfect match.
For leftovers, store them in airtight containers for up to three days. Or freeze for later. If you need a quick fix, refer to the troubleshooting tips to avoid common mistakes.
Which recipe will you try first? Start with the guides and adjust spices to your liking. Share your family’s venison traditions or tag us in photos of your creations. Every pot of venison stew has a story to tell. Now it’s your turn to cook one worth sharing.
]]>Do you know that, with the right materials and expert guides, you can craft an all impressive antler pumpkin for Halloween? Yes, you can and you need no professional skills.
Anyone can craft a perfect and preferred antler pumpkin when guided right. In this post you will discover valuable approved tips to enable you to create a rustic masterpiece to impress your guests and bring a touch of nature to your decor.
What Is Deer Antler Pumpkin Carving
Deer antler Pumpkin Carving is a unique activity that can transform a pumpkin into a stunning and warmth display, it blends nature and art and the outcome is always beautiful.

This is a creative twist on traditional carving, it has gained popularity because it adds a natural, woodsy touch to seasonal décor, which is perfect for autumn and outdoor-inspired themes.
Essential Materials Needed For A Successful Deer Antler Pumpkin Carving
To perfectly craft your own antler pumpkin, you need some basic tools and materials. These materials will help you achieve success.
- Pumpkin
Pumpkins can not be excluded in necessary materials for deer antler carving.Choose a medium large pumpkin that has smooth surfaces. It enhances easy carving and produces a shape that complements the deer antler design.
A pumpkin tool set is needed to achieve the best pumpkin design. The carving kit, consider tools that contains these key materials
- Pumpkin scraper: It is used for cleaning the inside of the pumpkin
- Pumpkin carving saws: Utility saw for broad cuts and Detail saw for cutting intricate areas like sharp angles and curves.
- Etching tool: Useful in adding fine details to the craft.
- Stainless steel and storage bag.
- Stiff Metal Spoon
It is necessary to scrape out the interior of the carving face to a relatively thin, even thickness before you start carving. Plastic spoons might not give you the best results. It is good to get a stiff and metal spoon to aid this adventure.
- Stencils/Template
In crafting a deer antler pumpkin carving, it is necessary to have a stencil to ensure accuracy in your design.You can download a deer antler stencil in PDF format, which you can print and use as a guide for carving.
- An X-Acto Knife
An X-Acto knife is sharper and the set is the best way to do ultra-fine work, like hair, eyes, wrinkles, or teeth on your design.
- Plastic wrap
Pumpkins start losing moisture as soon as you cut them open. As the pumpkin loses water, its structure collapses, causing droops and wrinkles in your design. Your perfect craft can turn miserable in 24 hours without a wrap.
It is highly recommended to use plastic wrap to hold the stencil in place when you are carving. This will perfectly transfer the design onto the pumpkin.
- Marker or Pen
It is good to sketch your design on the pumpkin with a washable marker or pencil to view your design before you start crafting. This will help trace the template and avoid mistakes.
Additional tools include Paper towel or cloth for cleaning and Led Light for illumination.
Explore these essential pumpkin carving toolkit for my information
The 9 Expert Approved Tips/Guides For Deer Antler Carving.
- Gather all carving tools
The first tip to carving the perfect deer antler pumpkin is to gather the right tools that you will use for the activity. Ensure to have all the tools listed above functionable.endeavor to use quality tools especially a complete carving kit.
- Choose the right pumpkin.
The right pumpkin has a direct influence in making your design appealing or not appealing.
Pumpkins with a sturdy stem and thick walls are best options for carving a great antler design, such are less likely to collapse or deteriorate quickly. Consider a round large pumpkin with a smooth surface.
- Set Up A Clean Workspace.
Pumpkin carving comes with some mess,and it is necessary to manage and keep your workspace organised. To ensure this, you can prepare your carving area with trash bags and tools.
- Use A Stencil/Template.
One tip to perfect your deer antler pumpkin carving is to always have an outline before you commence the crafting activity. The deer antler stencil can provide a use outline to guide the outline. With the template, you can pre sketched your design on a paper before crafting it on the pumpkin.
After sketching, try to outline your design with washable marker or pencil to lightly sketch the antlers on the pumpkin’s surface and ensure it meets your preferences before cutting.
- Now carefully gut the Pumpkin
Use a large pumpkin saw or a kitchen paring knife. It is always good to cut the top of the pumpkin and make sure that you angle the knife towards the centre of the pumpkin, so the lid won’t fall in when it has been cut loose.
You can also start cutting from the button pumpkin’s which can preserve the pumpkin shape and makes it easier to place a light source inside without compromising.
Cut the main outline of the antlers first and gradually the intricate details.
- Add Detailing To The Antlers.
Adding these features aims to mimic the look of real antlers, you can use a Dremel tool or X-Acto knife to carve textured grooves, ridges, and slight nicks for a perfect outcome. Rougher texters create and give a natural look to the design.
- Hollow Out The Pumpkin Fully And Maintain Thin Walls
Ensure to carefully scoop out the insides of the pumpkin thoroughly, especially around the carved sections.
Remove all excess pulp and seeds to allow light to shine through the carved areas. thin the walls of the pumpkin to about 1/2 inch thick after cleaning the insides. Thai makes it easy to shine through your carving designs.
- Illuminate Your Design With Lightning

Lightning enhances the carved antlers’ look, you can place lace LED lights inside the pumpkin to create the best glow and you will admire your design. Avoid candles to prevent heat and damages.
- Ensure To Preserve And Keep Your Pumpkin Safe.
Store and keep the pumpkin in a cool place to delay it from decay. You can keep it hydrated by spritzing it with water occasionally or apply a spray sealant or coat the edges of the carved areas with petroleum jelly.
Let’s wrap up.
Now, deer antler pumpkin carving has been simplified. You can create your desired and eye catchy designs, just carefully follow these tips. Do not be afraid to exhibit your artistic skills with different styles that reflect your taste.
Try out your design and come back to share your results in the comments section or on the deer hunting gateway.
You can watch this YouTube video on Pumpkin carving tips and tricks for more insights.
]]>A well-constructed hunting camp is fundamental to ensure a comfortable and successful hunt during every hunting season.
When hunting season arrives, A well-planned and constructed hunting camp provides comfort, safety, and a communal space for hunters to bond and strategize. This allows them to focus on the thrill of the hunt and create lifetime memories.
A hunting camp serves as a base of operation for hunters, offering a place to rest, prepare, and share stories.
Unlike a simple hunting cabin, which may be more permanent, a hunting camp can be more flexible and tailored to your specific needs.

In this guide, you’ll learn everything you need to build a hunting camp like a pro, from planning, to setting up, and maintaining a professional-grade hunting camp.
Section 1: Pre-Planning Your Hunting Camp
Choosing the Right Location when Building a Hunting Camp
Selecting the right spot for your hunting camp is important, consider these factors
- Proximity to Hunting Areas Look for a location that’s close to your prime hunting areas but not too close that your presence scares off game.
Ensure accessibility, especially if you’re bringing along a buddy, as getting gear and supplies into remote areas can be challenging.
- Access to a reliable water source and tree cover: which can offer natural shelter and help break the wind. Nearby water sources are vital for cooking and cleaning
- Additionally, ensure the area is elevated to avoid flood-prone zones during heavy rains.
Scouting the area before making your choice ensures you understand the terrain and wildlife patterns.
Additionally, check for any necessary permits or land access rights to avoid legal issues later on, especially when hunting on public property or private lands.
Planning for Different Seasons When Building a hunting camp
Pay attention to seasons when building a hunting camp, your camp setup will vary significantly depending on the season.
- Winter (colder months). You’ll need to weatherproof your camp, paying close attention to insulation, roof design, and access to warmth. Ensure your camp is insulated properly, with windbreaks provided by logs or siding,
- Summer (warmer months), make sure your camp offers good ventilation to manage heat and stay comfortable.
Consider building your camp in a shaded area, perhaps under the canopy of tall trees, to stay cool.
Weatherproofing Tips. Invest in durable materials that can withstand rain, snow, and extreme heat.
Rain can soak equipment and food, so ensuring your storage setup is off the ground and sealed is essential.
Understanding game movement patterns during different seasons can also influence where you set up your camp.
Setting a Budget
Building a hunting camp or cabin can range in cost depending on the level of comfort you’re aiming for.
As much as we perceive building a hunting camp to be more cost-effective than building a hunting cabin, it has to be planned properly.
Decide where you want to splurge— Balance cost with quality by investing more in durable shelters and essential gear like stoves, while saving on items you can easily replace or upgrade later.
Get more ideas for building an inexpensive camp here.
Section 2: Essential Equipment and Materials for Building a Hunting Camp
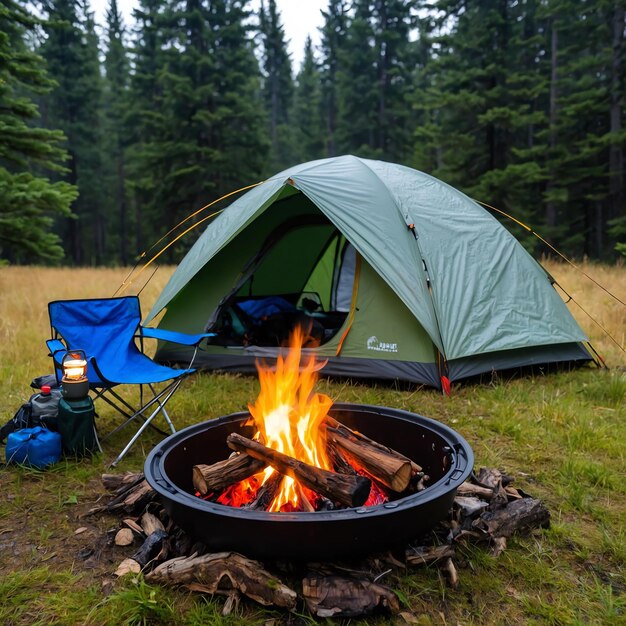
Shelter Options: Tents, Cabins, and DIY Structures
Your shelter choice should depend on how long you plan to stay. When it comes to shelter, you have a variety of options.
For a more permanent setup, a hunting cabin provides insulation and protection but requires more upfront investment and maintenance. For a more flexible solution, tents or DIY shelters using natural materials are ideal.
- Cabins: Solid structures with weatherproof siding, interior storage for gear, and windows for ventilation.
- Tents: Lightweight and portable, perfect for shorter stays or hunters who move around frequently.
If you’re on a budget, a DIY approach—using local materials to build a temporary shelter—can also be effective.
Whether it’s a tent or cabin, focus on insulation to maintain warmth during the cold months and ventilation for the heat.
Proper interior setup, such as designated sleeping and eating areas, enhances both comfort and safety.
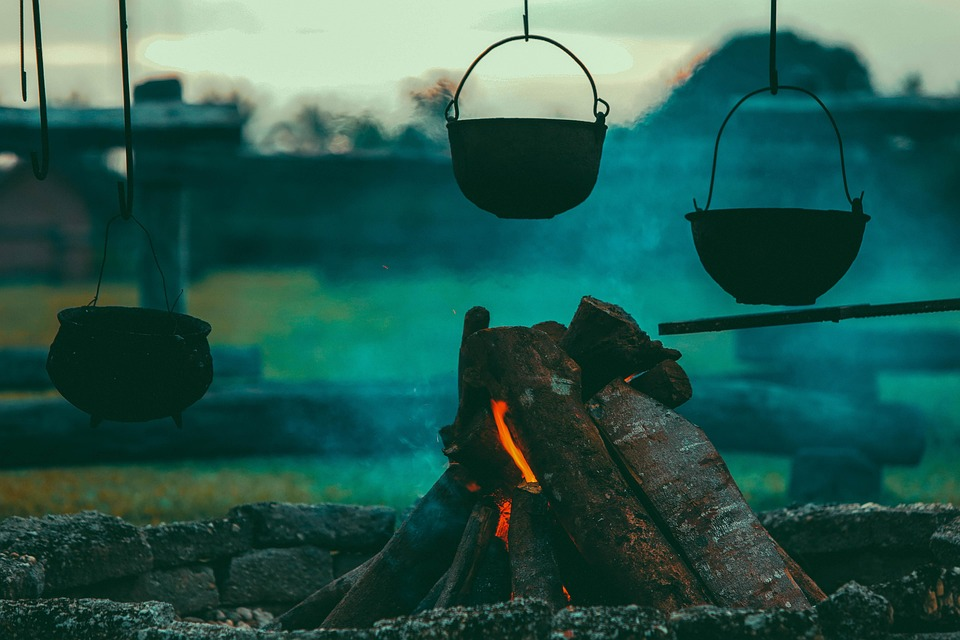
Campfire and Cooking Setup
Cooking and warmth are central to any hunting camp. Set up a stove or portable grill near your camp’s center but at a safe distance from your shelter. A well-built fire pit serves dual purposes: warmth and meal preparation.
Cooking outdoors is part of the charm, but make sure your setup is practical, easy to manage, and animal-proof—especially in bear territory.
Sleeping Arrangements
For a good night’s rest, you can’t overlook your sleeping setup. Depending on the weather and your preference, options include sleeping bags, hammocks, or a camp bed.
To stay comfortable, ensure the sleeping area is elevated and insulated against the cold when building a hunting camp. Setting up camp under a tree or adding a temporary roof over your sleeping spot will help keep the area dry
Power and Lighting Solutions
In today’s hunting camps, having some form of power is essential, even in the backcountry.
Solar-powered lighting, portable generators, and battery-powered lanterns are lightweight options that can keep your camp well-lit without relying on heavy fuel sources.

Bring a solar charger or small generator to keep essential devices like GPS units or radios powered during your stay.
Section 3: Camp Setup and Layout
Organizing the Layout for Functionality and Safety
When building a Hunting camp, your layout should prioritize safety and functionality. The cabin or shelter should be placed upwind from the kitchen and fire pit to avoid smoke and smells drifting into your sleeping area.
Storage for food and equipment should be secure and placed away from the shelter to avoid attracting animals. Keeping the camp clean is not just about comfort—it’s essential for safety.
Sanitation and Waste Management
Proper waste management ensures a sustainable camp. Set up a toilet away from your water source and follow Leave No Trace principles by packing out what you pack in.
For extended stays, portable sanitation systems are ideal, or you can build a simple outhouse or composting toilet.
Section 4: Maintaining and Managing Your Camp
Maintenance Tips for a Long-Lasting Hunting Camp
Regular upkeep is key to a long-lasting hunting camp, to ensure your camp lasts for multiple seasons, make sure to frequently inspect your camp’s shelter, cooking equipment, and sleeping area.
Secure your gear in weatherproof storage containers when not in use, and check the condition of your tents or cabins at the end of each season.
Staying Safe in the Wilderness
Safety should always be a top priority. Make sure you pack an emergency shed or storage area with first aid kits, survival gear, a shower solution for hygiene, and emergency communication devices like satellite phones or radios. Knowing how to handle encounters with wildlife, especially bears, is crucial for any hunter in the wild.
You can select from these essential hunting accessories and the best hunting gear list for deer hunters.
To wrap up
Building a hunting camp is a rewarding endeavor that can elevate your overall hunting experience. It involves thoughtful planning, essential gear, and effective maintenance.
A well-prepared hunter is a successful one, and a well-built hunting camp will not only provide comfort but also help you make the most of every hunting season.
By following this guide, you can create a camp that offers comfort, safety, and functionality, as well as ensures a successful hunting season.
If you are setting up a hunting cabin or a temporary shelter, being well-prepared will elevate your hunting experience.
If you’re ready to get started, check out our recommended products and share your hunting camp tips with the community at Deer Hunting Gateway.
]]>Outdoor cooking and camping life blend two great pleasures: enjoying the beauty of nature and savoring delicious meals cooked over a fire or portable stove.
They offer more than just sustenance; they allow you to connect with nature while enjoying hearty meals that fuel your adventures.
There is that unique experience you get from the combination of the smell of fresh air, the sound of a crackling campfire, and the satisfaction of a meal cooked over an open flame.
As a hunter or a camper, having practical, easy-to-make recipes that cater to your needs can make all the difference if you find yourself deep in the backcountry or at a comfortable camp.
This article introduces 8 essential recipes designed to keep hunters and campers energized and satisfied to embrace the outdoors.
These meals require minimal gear, making them perfect for hunters on multi-day adventures or those relaxing after a successful day in the field.
8 Recipes For Outdoor Cooking And Camping Life
1. Campfire Breakfast Burritos
This is a protein-packed meal that’s easy to cook. It’s quick, portable, and packed with energy, making it a perfect breakfast for the adventurous camper.
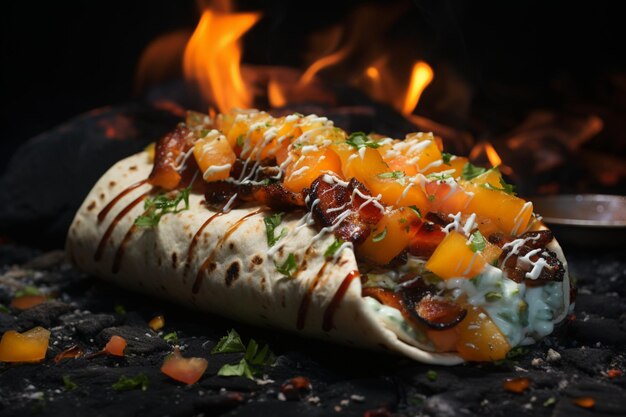
- Ingredients: Eggs, sausage, potatoes, cheese, tortillas.
- Directions: Cook the sausage and potatoes in a skillet over the fire, then scramble the eggs. Wrap the mix in tortillas with cheese and heat briefly over the campfire for a melted finish.
- Helpful Hint: Prepare the ingredients the night before, so the morning cook time is quick, leaving you more time to hunt and cap.
2. Venison Skewers
This quick meal makes use of fresh wild game meat, allowing you to grill delicious, flavorful meals right at your camp.
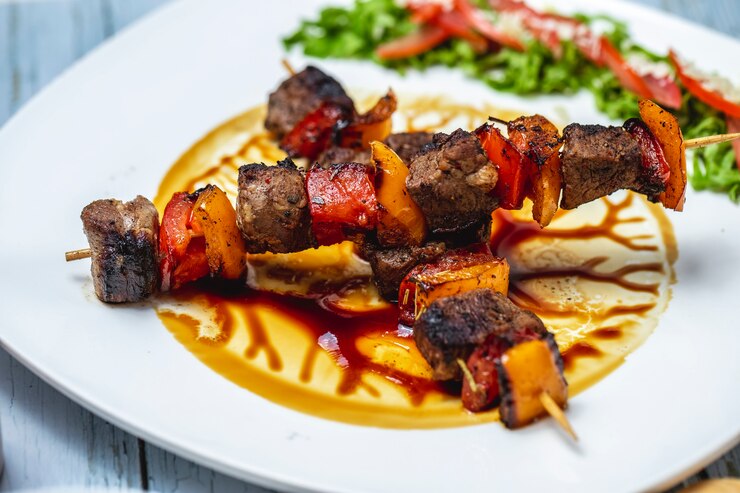
- Ingredients: Venison chunks, bell peppers, onions, olive oil, spices.
- Cooking Directions: Marinate venison chunks in olive oil and spices, then skewer them with vegetables like onions and bell peppers. Grill over the fire for a smoky flavor.
- Helpful Hint: Marinating the venison for at least an hour before cooking, this will enhance the tenderness and flavor of the meat.
This meal is a favorite in camps across the US and Canada.
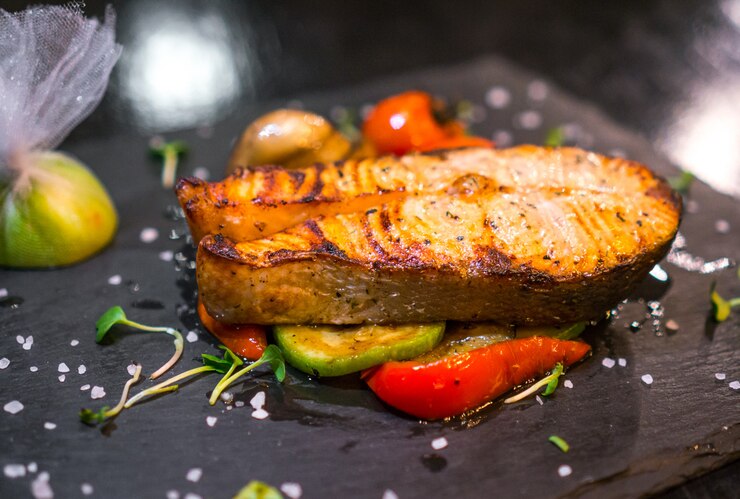
3. Foil-Wrapped Salmon With Veggies
A Lightweight and nutritious meal that is ideal for campsites near rivers where you might fish for fresh salmon.
- Ingredients: Fresh salmon, zucchini, carrots, lemon, garlic, herbs.
- Cooking Directions: Place the salmon and veggies in foil with a splash of lemon and garlic. Wrap it tightly and cook it over the campfire coals for 10-15 minutes.
- Helpful Hint: Pre-cut veggies and store them in your cooler for an easy meal. This recipe is widely appreciated among hunters who enjoy the simplicity of foil packet meals.
4. Dutch Oven Stew
This is a warm, hearty stew and the ultimate comfort food for a long day of hunting,

- Ingredients: Venison or beef, potatoes, carrots, onions, broth.
- Cooking Method: Combine ingredients in a Dutch oven and let it slow-cook over the fire for a rich and hearty meal.
- Helpful tip: Let the stew simmer while you unwind at camp—it requires minimal attention and delivers maximum satisfaction.
5. Grilled Kebabs with Wild Game
A simple, customizable meal, hunters can use any wild game meat they’ve caught to prepare it, it is one essential outdoor cooking and camping life recipe you should try.
- Ingredients: Choice of wild game (deer, rabbit), bell peppers, mushrooms, onions.
- Cooking Directions: Skewer and grill over the fire or use a portable stove for ease.
- Helpful Hint: Add rosemary and thyme to enhance the natural gamey flavors of the meat. Kebabs are a favorite among backcountry campers, offering a rustic yet satisfying meal.
6. Campfire Chili
This chili is a crowd-pleaser that’s easy to cook for large groups of hunters after a long day outdoors. It’s hearty, filling, and perfect for cold evenings.
- Ingredients: Ground venison, beans, tomatoes, chili powder, garlic.
- Cooking Directions: Cook the ingredients in a large pot or Dutch oven over the campfire.
- Helpful Hint: Pre-make the seasoning mix at home to save time at camp. This chilli recipe is popular in outdoor camps across North America, from Alaska to Colorado.
7. Campfire Beans
This is an excellent recipe for outdoor cooking and camping life. It’s a hearty, easy-to-prepare dish that fits perfectly with the camping lifestyle of hunters.
Beans are nutrient-dense, making them ideal for maintaining energy during extended hunting trips.
They’re simple but flavorful, making them an essential part of any hunter’s outdoor cooking and camping life.
- Ingredients:Canned beans (pinto, black, or mixed), Bacon (optional), Onions,Garlic,Tomatoes, Brown sugar or molasses, Chili powder, salt, pepper, Water or broth (optional for thinning)
- Cooking Directions: Campfire Beans, cook bacon until crispy, then sauté onions and garlic in the same pot.
Add beans, tomatoes, and seasonings, simmer for 20–30 minutes, and stir occasionally. Add the crispy bacon back before serving. Simple and ideal for campfire cooking.
- Helpful Hint: Bring pre-cooked or canned beans to save time. For a smoky flavor, cook the beans over the fire and let them simmer while you’re enjoying other camp activities.
8. Pan-Seared Trout
This Outdoor and Camping Life Recipe is great for hunters or campers who enjoy fishing as part of their outdoor adventure, this trout recipe is simple and delicious.
- Ingredients: Fresh-caught trout, butter, garlic, lemon, herbs.
- Cooking Directions: Pan-sear the trout in a cast-iron skillet with butter, garlic, and lemon over the fire.
- Helpful Hint: Pair with a side of fire-roasted potatoes or veggies for a complete camp dinner.
Interested in this meal, you can watch this youtube video for more insights
Table 1: Other Outdoor and Camping Life Recipes to Consider.
| Outdoor Cooking and Camping Life Recipe | Key Ingredient | Cooking method |
| Grilled Burgers and Salad | Ground beef or venison, cheese, lettuce, tomatoes, buns | Grill over the campfire or on a Coleman stove |
| Chicken and Waffles | Sourdough,baking soda,salt,sugar, eggs,butter, chicken breasts,garlic powder | Fry or Grill |
| Creamy Campfire Clam Pasta with Tomatoes | Pasta, olive oil,clams,Parmesan cheese,fresh parsley, garlic, soices | Simmer and sauté |
| Camping Baked Potatoes with Herbed Sour Cream | Baking potatoes, Olive oil, Salt, Aluminum foil, Sour cream, Fresh herbs, salt and peper | Baking |
| Snacks |
Find more additional recipes on food network and outdoor life
Final Words
There’s something really special about outdoor cooking and camping life, it’s not only about the food, but the whole experience. Yet still, having easy-to-prepare and hearty meals will make hunting/ camping more fun.
I have clearly provided 8 essential recipes to choose from, these include; Campfire Breakfast Burritos,Venison Skewers, Foil-Wrapped Salmon With Veggies, Dutch Oven Stew, Grilled Kebabs with Wild Game, Campfire Chili, Campfire Beans,Pan-Seared Trout.
There is no need to stress yourself about complicated meals when packing for your next trip. These easy, delicious recipes will make your time in the wild more memorable.
If you have your own campfire meals, share them with your fellow campers, remember outdoor cooking is enjoying it together.
Share your favorite recipes and tips with the Deer Hunting Gateway community. Happy hunting, happy cooking!
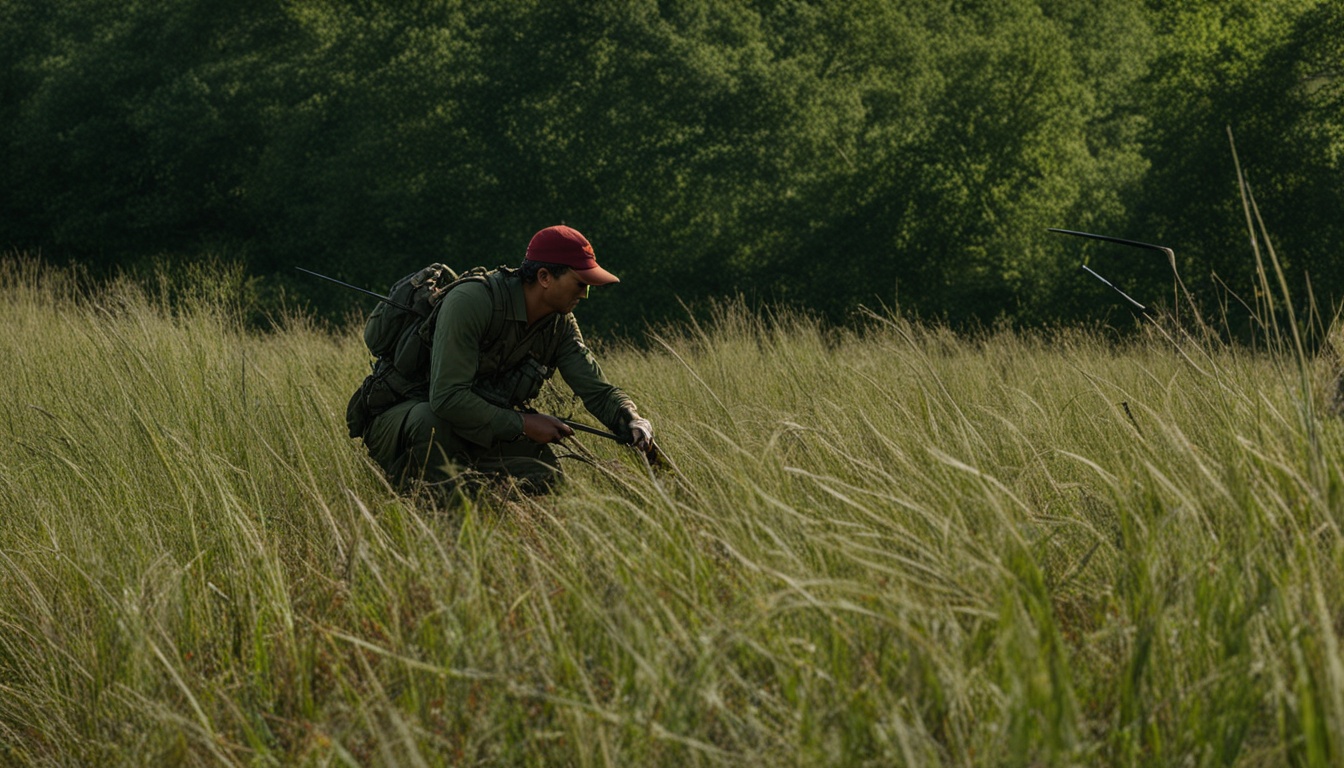
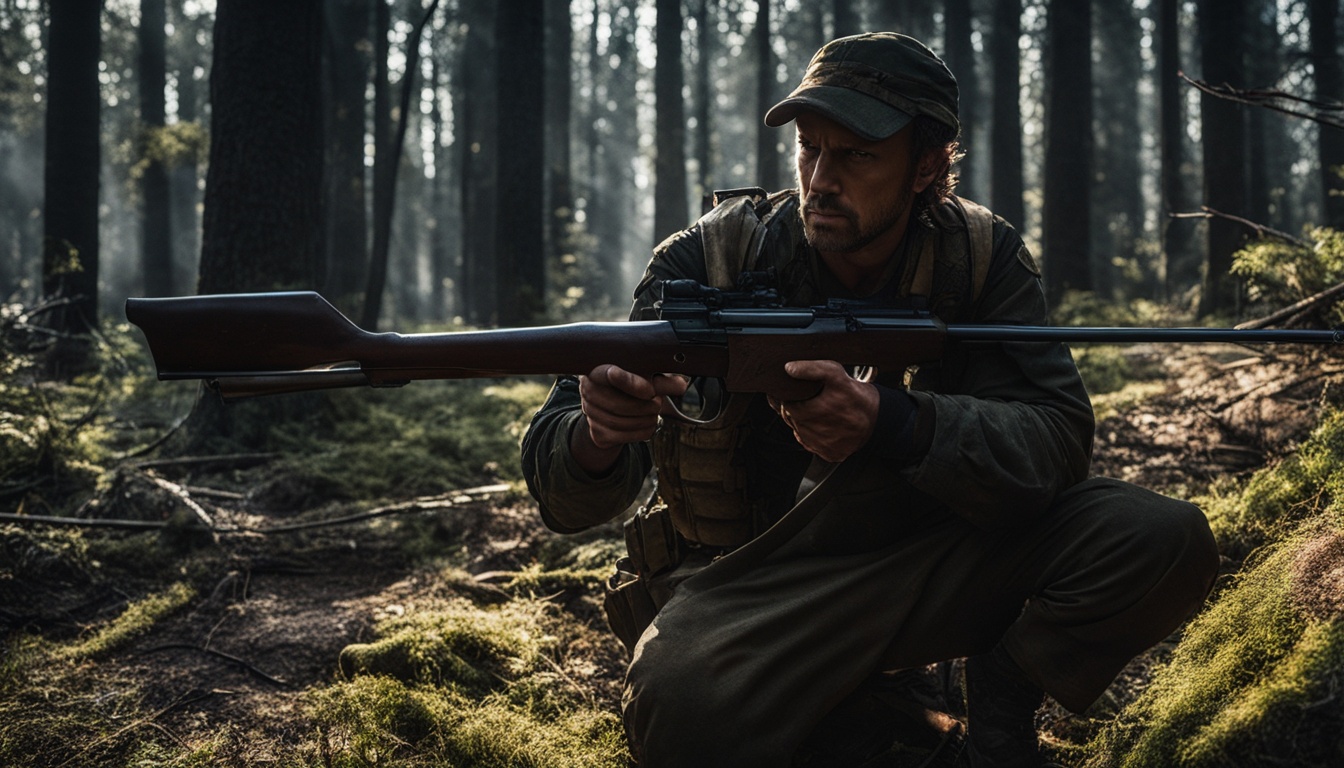
]]>In such cases, the recovery and responsibility of tracking wounded game rest on the hunter. What do they do, and not just that, but what are the right ways to do it as well?
This guide will explore the techniques and best practices for tracking and recovering wounded animals, ensuring your efforts at hunting responsibly are not thwarted.
Ethical Responsibility and Initial Steps
Responsible hunting or hunting ethically is about respecting the life of the animal and ensuring its suffering is minimized. Your first priority as a responsible hunter should be to track and recover any wounded game no matter how difficult it is or the time required.
Even if the animal flees at the sound of your shot, assume it was hit and take the necessary steps to go get it.
Although sometimes difficult, it can be easier to track wounded animals if you follow a systematic approach and understand the signs left by the animal.
The following are a few things you can do:
Tracking Wounded Game
- Observe The Animal Behavior After the Shot
Watch how the animal reacts to see where you hit it and how badly it’s hurt. Look for signs like how it moves, the direction it goes, and any injuries or blood. These clues help guide your tracking.
- Mark the Location and Waiting Period
Mark where the animal disappeared with a landmark, compass, or GPS. This spot is where you start tracking. Wait 30 minutes to an hour before searching. Don’t be in a hurry because waiting lets the animal weaken and the blood trail get clearer.
- Identifying Blood Signs and Patterns
Start by checking the spot where the animal was shot. Look for blood signs to understand the wound and the animal’s condition. This is where you should know the difference between lung, gut, and grazing wounds because this will help you gauge the severity of the would and track how difficult or easy it will be to track the animal.
- Using Tracking Tools and Trail Markers
Having the right tools helps in tracking wounded game. Toilet papers are good for marking blood spots. A compass is also useful for keeping track of the animal especially when the blood signs fade.
In cases where the blood trail is hard to see, you can move slowly and use your senses. Listen for sounds be patient and observant. To really track a wounded animal you will need to be persistent and pay strong attention to detail.
Remember you goal is to track and recover the animal humanely so you have to be committed to doing just that
Now you have an idea how you can track your wounded game, but sometimes how would you know to track the right game? What if there are previous blood trails in the area?
How can you avoid wasting time only to find out the game you tracked was not the one you shot? Let’s look at that next.
Blood Trail Clues
Where your shot hits and the blood spilled can tell you how badly an animal is hurt. This can help guide your search to find it.
The color of the blood trail tells you a lot about the shot. For example:
- Bright red or pink blood with bubbles means a hit to the lungs or heart. This shot is usually fatal, happening within 5-10 seconds.
- Darker, crimson blood means a hit to the muscles or liver. The animal might take up to an hour to die.
- Greenish blood with food bits means a gut shot. This is the toughest to recover, as the deer may travel far before dying, taking 5 hours or more.
Deer may also exhibit different reactions depending on the intensity of the shot. A deer hit badly will usually lie down within 200-300 yards and die soon, unless scared away.
If scared, it may run a 1/2 mile or more, leaving blood drops if the shot was not good. This could make tracking hard.
Now, after you have used blood trail clues to catch your game, you need to learn how to kill them responsibly if they are not fully dead, what’s more, you should also be able to tell if the meat is safe for consumption too.
Tracking Wounded Game: Prioritizing Humane Recovery
In responsible hunting, timing is everything when tracking a wounded game. Waiting too long lets the animal suffer. But acting too soon can also make it hard or impossible to find.
The humane thing to do is to:
- Watch how the animal acts after the shot to see how bad the wound is.
- Wait at least 30 minutes before tracking to let the animal weaken from its injury.
- Look for blood signs and patterns to follow the animal, telling apart bright red arterial blood from darker, clotted blood.
- When you find the animal, come up from behind to avoid a dangerous fight.
Preserving Meat Quality
While considering humane techniques, to really keep deer meat good, you need to get to it fast. Waiting too long makes the meat taste bad.
It’s important to handle and store the meat right to keep it fresh and tasty.
Here are some ways you can preserve the quality of your meat.
- Know the animal’s body and how it reacts to the shot to check if it was a good hit.
- Follow the rules for tagging and moving the carcass to keep it safe and sound.
- Use Responsible Hunting methods to reduce the animal’s pain and keep the meat quality high.
Go Get Your Game!
Tracking wounded deer or bear takes patience and knowledge of animal behavior. It’s a tough task, but the reward of a successful recovery is huge.
If you follow ethical hunting principles, you’ll become a better tracker. This helps keep your sport sustainable for the future.
Remember to focus on humane recovery and keeping the meat quality up!
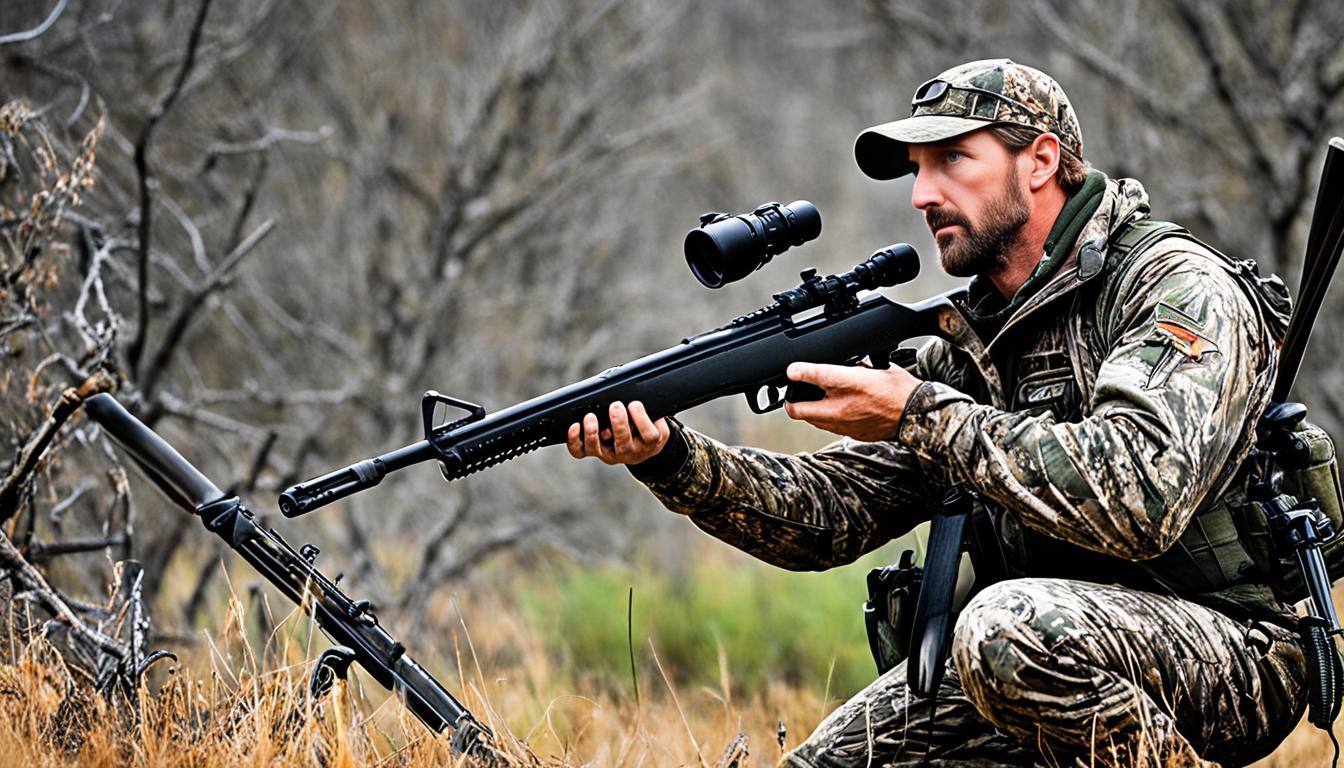
]]>In this comprehensive guide, we will take an in-depth look into how to call like a pro, with a focus on three specific animals: turkeys, coyotes, and mallard ducks.
Understanding Turkey Vocalizations
Birds have many sounds, each with their own purpose. As a hunter, you should know these sounds so you can either identify or hunt turkeys more effectively.
Let us examine a few:
Cluck
The cluck is a sharp sound turkeys use to stay in touch. Hunters can use the cluck to keep turkeys interested. This can help in a successful hunt.
Purr
The purr is a soft sound turkeys make when they’re happy or socializing. Hunters can use the purr to make turkeys feel safe and come closer.
Gobble
The gobble is a loud call only males make. It shows they’re availability and mostly is used to attract hens. Hunters can use the gobble to bring in other turkeys, either out of curiosity or to challenge them.
Kee-kee run
The kee-kee run is a high-pitched whistle young turkeys make when they’re lost. Hunters can use this call to show they care and bring in turkeys of all ages.
Choosing the Most Effective calling technique
There are many types of ways you can call a turkey. Depending on your hunting style, you can use any of the calls to attract turkey.
Let us look at the different types, and then you get to choose what works best for you depending on your style and hunting conditions:

Box Calls
Box calls are easy to use and great for making realistic turkey sounds. They have a chamber and a stick, or paddle. Rubbing them together makes the sounds turkeys make. Even beginners can learn to use them quickly.
Pot Calls
Pot Calls are mostly used by hunters because of their range of sounds. They have a circular pot with a striking surface. When the striker is hit on the pot, hunters can make different turkey sounds.
This type of call also allows hunters to control the sounds well, attracting turkeys.
Diaphragm Calls
Diaphragm Calls are hands-free and versatile but to use them, you will need practice. They usually have a frame with a latex reed in the mouth.
Blowing air across the reed makes different turkey sounds. Diaphragm calls are very useful because they let hunters call without losing their shooting position. But, they take skill to use well.
Push-Pull Calls
Push-Pull Calls are very simple. They usually come with a box and a spring and a peg. Moving the peg makes different turkey sounds.
This kind of call is great for beginner hunters or those who want a reliable call.
Locator Calls
Locator Calls help find turkeys by mimicking sounds like a crow or coyote. They don’t sound like turkeys, so they won’t scare them away.
Using them right can help hunters locate turkeys from afar. The best time for using these calls are early in the morning or late afternoon.
Turkey Calls Summary: Effective Calling Techniques
When learning turkey calls, you should start with the basics like clucks. Later, you can move to more complex calls. To really replicate these sounds, you should listen to real turkeys or recordings to learn their sounds.
When implementing these calls, you should take not of how loud you call. Ensure that your calls are moderate such that they attract turkeys far way without scaring those close by.
Also learn to adjust your calls based on how the turkey reacts to increase your chances of success.
In summary:
- Develop a strong foundation in turkey vocalizations by mastering easy calls such as clucks before moving to more advanced calls.
- Observe and learn from real turkeys or recordings to gain a deeper understanding of their calls.
- Adjust your calling volume to attract distant turkeys without distracting nearby ones.
- Time your calls carefully to engage a turkey’s curiosity without scaring it away.
- Adapt your calling strategy based on the turkey’s response to increase your chances of success.
Mastering Effective Calling Techniques For Coyote
Previously hunters used rodent and rabbit calls to hunt coyotes. However, they are are getting smarter and harder to hunt with just rodent or rabbit calls.
Now, hunters need to use different Coyote Vocalizations to catch them. This includes non-aggressive male howls and female yodels or pup sounds.
Using Coyote Vocalizations
Coyotes make over two dozen sounds to talk to each other. Interesting right?! Usually from January to March, these sounds work better than calls for prey.
In some instances, a special Coyote Call Sequence may be appropriate. It starts with electronic male howls, then a female yodel, a calm howl, a distress call, and finally, sounds of pup distress and death.
This mix makes coyotes curious and think there are more of them. Handmade coyote equipment have big benefits over store-bought ones because they are made just for you and will sound better and coyotes won’t recognize them.
Effective Calling Techniques for Mallard Ducks
Mallard ducks are a top choice for Waterfowl Hunting. If you are looking to hunt these birds, learning their calling techniques is a good way to go.
Mallards use different calls for various situations, like decrescendo calls for females, chuckles for feeding and flying together, and common quacks for other needs.
Mallard Call Vocalizations
Using the right calls is important because when you use them right, you can help attract these birds.
Calls like quacks, feeding calls, comeback calls, and hail calls can be used to get better results.
To get the most out of your waterfowl hunting expedition, you need to have the right hunting gear and really master these duck calling techniques.
Effective calling techniques for ducks is about precise mouth movements and controlled air. To get better, you should learn to mimic mallards’ sounds, including the basic quack and chuckle sequence and practice often.
Now let’s take examine the differences between some two duck calls.
Effective Calling Techniques: Single Vs Double Reed Call
First, you should know that the type of duck call you pick depends on the situation and the sound you want.
Single-reed calls on the other hand are versatile, letting you make many mallard sounds, from basic quacks to complex ones.
Double-reed calls are also easier for beginners, needing less air pressure and making a raspier sound.
Next, let us examine some advanced duck call strategies.
Advanced Duck Call Strategies
Before you get to this stage of mastering advanced duck call strategies, you should understand that duck hunting goes beyond just basic calling.
One tactic you can learn is mimicking a “lonesome hen” to attract other ducks looking for a mate or a group. This works best during breeding season when ducks answer calls from a lone female.
Another trick is using “hail” or “highball” calls to get ducks’ attention from above or far away.
When you become an expert in Duck Calling Techniques, you will learn how to mix different duck sounds. Mixing these calls will make it sound like a lively flock, which will catch ducks’ attention and bring them closer.
But to get there, you need to keep working on your skills and adjust to changing hunting conditions. This will improve your Duck Hunting Strategies and Waterfowl Hunting Tactics a lot.
Go Ahead And Learn!
A serious hunter knows that to attract the game you want, you need to put in some extra effort. This includes learning some of these calls.
Mastering calling takes time and effort but these skills can determine if your hunt turns into a success or a miss.
All the best on your journey to learning the wild’s secrets and becoming a true calling expert.
]]>“In nature, nothing is perfect and everything is perfect. Trees can be contorted, bent in weird ways, and they’re still beautiful.” – Alice Walker
Gregory Smolin is a photographer who knows birds and landscapes well. He says knowing your subjects is key to great wildlife shots. This helps you guess their actions and find the best focal length shots.
It doesn’t matter if you use a fancy camera like Smolin’s Sony a7Riii or your smartphone to shoot wildlife. The main thing is to improve your observation skills and avoid camera shake. While you let the camera do the work, you’ll need patience, fast thinking, and a love for nature.
Are you ready to start? Let’s look at some key tips for wildlife photography to get those good photos.
Understanding Wildlife Photography Basics
Wildlife photography combines art and science. It lets you take amazing photos of animals in their natural settings. You must know about animal behavior, their homes, and how to photograph them ethically.
Knowing Your Subjects and Their Habitats
To take a photo; I mean take great wildlife photos, do your homework. Learn about the animals you want to photograph. Understand their habits, where they live, and what they do every day.
This information helps many wildlife photographers guess their actions and find places to take great photos or better images.
Essential Equipment for Wildlife Photography
Even if you’re a beginner wildlife photographer, in getting the right gear to capture wildlife, you’ll need:
- A weather-sealed camera body
- Telephoto lenses (300mm to 600mm)
- Sturdy tripod or monopod
- Fast memory cards
- Extra batteries
Importance of Patience and Observation
When it comes to wildlife photography you’ll need a lot of patience. Moving animals won’t pose for you. You might wait for hours for the perfect shot. You’re using this time to watch and learn. In professional wildlife photography, silent shutter mode helps you not scare your subjects.
“The best wildlife photographers are those who can think like the animals they’re photographing.”
Remember, it’s important to photograph wildlife ethically. Keep a safe distance, don’t harm their homes, and never use bait. To get great photos of animals, aim to capture real behavior, not fake scenes. With patience and respect, you can usually take several stunning photos that show the wild world’s beauty.
Let’s now look at the tips for wildlife photography that can greatly impact your images.
Choosing the Right Camera and Lenses
Finding the right gear is crucial for your wildlife photos to look good. The camera and lenses you choose can greatly improve your wildlife photography and allow you to shoot great photos of different types of animals.
The following are tips for wildlife photography that you need to know to ensure you take stunning pictures like an experienced wildlife photographer!
Best Cameras for Nature Photography
For wildlife and landscape photography, look for cameras with high resolution, good zoom lens and good low-light performance. For the best composition, many experts prefer full-frame DSLRs or mirrorless cameras.
The Sony ⍺1 is a top pick for its speed and image quality. But depending on your camera to choose, you don’t have to spend a lot. A crop sensor camera in hand can also work well, offering more reach with your lenses.
Selecting Appropriate Lenses for Different Scenarios
The right lenses are key for wildlife photography. Here’s a quick guide:
- Wide-angle (10-35mm): Great for landscapes and environmental shots
- Standard (35-85mm): Versatile for various nature subjects
- Telephoto (70-200mm+): Perfect for distant wildlife
For wildlife, telephoto lenses are often the best choice. The Sony FE 200-600mm f/5.6-6.3 is a popular option, priced at $1998. It gives you great reach without costing too much. To shoot in low light, fast lenses with wide aperture and shutter speed like f/2.8 or f/4 work best.
Importance of Weather-Sealed Equipment
Nature can be unpredictable. That’s why weather-sealed gear is essential. It keeps the camera and lenses safe from dust, moisture, and other outdoor challenges. This feature lets you shoot in tough conditions, making sure you don’t miss that perfect shot.
Remember, good camera settings for wildlife are just as important as your gear. Practice with your equipment to find the best settings for different situations. With the right tools and knowledge, you’ll be taking amazing wildlife shots in no time.
Tips for Wildlife Photography
Mastering wildlife photography takes time and practice. Start by understanding the animals to get the best photographs. Learn about animal behavior and where they live. This helps you get the best shots when photographing the animal.
For birds in flight, keep your shutter speeds at 1/500th or higher. This freezes their movement and makes your photos sharp. With mammals, be patient. Watch their behavior, prepare your lens and camera and wait for the perfect moment to snap a photo.
Storytelling through wildlife images is key. Don’t just take close-ups. Include the animal’s surroundings to tell a story. Try different angles to make your photos more interesting.
- Use the golden hours for soft, even lighting
- Shoot in continuous mode to capture fleeting moments
- Frame subjects off-center for dynamic compositions
- Get low for dramatic perspectives
Remember, ethical wildlife photography is important. Observe wildlife well, never disturb animals for a photo. Increase the length of your lens and keep a respectful distance. By following these tips for wildlife photography, you’ll get better pictures that tell powerful stories.
“The eyes are the windows to the soul in wildlife photography. Focus on capturing them to create engaging images.”
Mastering Camera Settings for Wildlife Shots
Getting your camera settings right is key to great wildlife photos. Let’s explore the main settings you need for amazing wildlife shots.
Aperture and Depth of Field
Aperture is vital in wildlife photography. For clear, detailed shots, use an aperture between f/5.6 and f/8. This keeps the animal looking sharp and the background soft. In bright light, a higher f-stop helps avoid overexposure and sharpens focus.
Shutter Speed for Capturing Movement
Your shutter speed can freeze or blur motion. For flying birds, set it to 1/2000th of a second. Fast-moving animals like deer need 1/1000th to 1/1600th. For still wildlife, 1/500th is enough.
ISO and White Balance Considerations
ISO is crucial in low light for wildlife. Keep it low (100-200) in bright conditions for clear photos. Set a maximum iso to 400-800 as light fades. In very dark scenes, go up to 1600 or higher. You can fix noise later in editing.
“The right settings can turn an ordinary wildlife shot into something extraordinary.”
Try these camera settings for wildlife. Practice in various lighting and with different subjects. Soon, you’ll be capturing nature’s beauty like a pro!
Composition Techniques for Stunning Nature Images
Wildlife photography composition is crucial for making images that tell a story. The rule of thirds is a great tool. Picture your frame split into nine parts by lines. Place your subject where these lines meet for a balanced shot. This method helps create images that grab the viewer’s attention.
Storytelling in wildlife photos is more than just showing the animal. Add depth with foreground elements. Use wide apertures (f/2.8 or f/4) to show the setting and mood. Negative space can show freedom and exploration, especially in big landscapes. The background is as important as the subject. A clean background makes your subject stand out and boosts your image’s impact.
Always put ethical wildlife photography first. It’s tempting to get close for a great shot, but keep a safe distance. This avoids disturbing the animals and their homes. Use long lenses for close shots without disturbing them. Shooting at eye level with your subject builds a connection with the viewer. These tips for wildlife photography ensures you approach nature with respect and helps wildlife conservation efforts.
Start Your Journey
Wildlife photography is a journey into the heart of nature’s untamed beauty. By mastering the interplay of essential equipment, you can capture stunning images that tell compelling stories.
Take these tips to heart and elevate your picture capturing skills!
]]>Whether you’re preparing it for a special occasion or incorporating it into your regular meal rotation. Professional chefs have mastered the art of cooking venison, and with these tips and recipes, you can be one.
This guide will cover everything you need to know about cooking venison, from marinating techniques to classic recipes like pan-fried venison, venison pot roast, and venison steaks.
Ready to bring this delicious meat to your table with confidence? Let’s go!
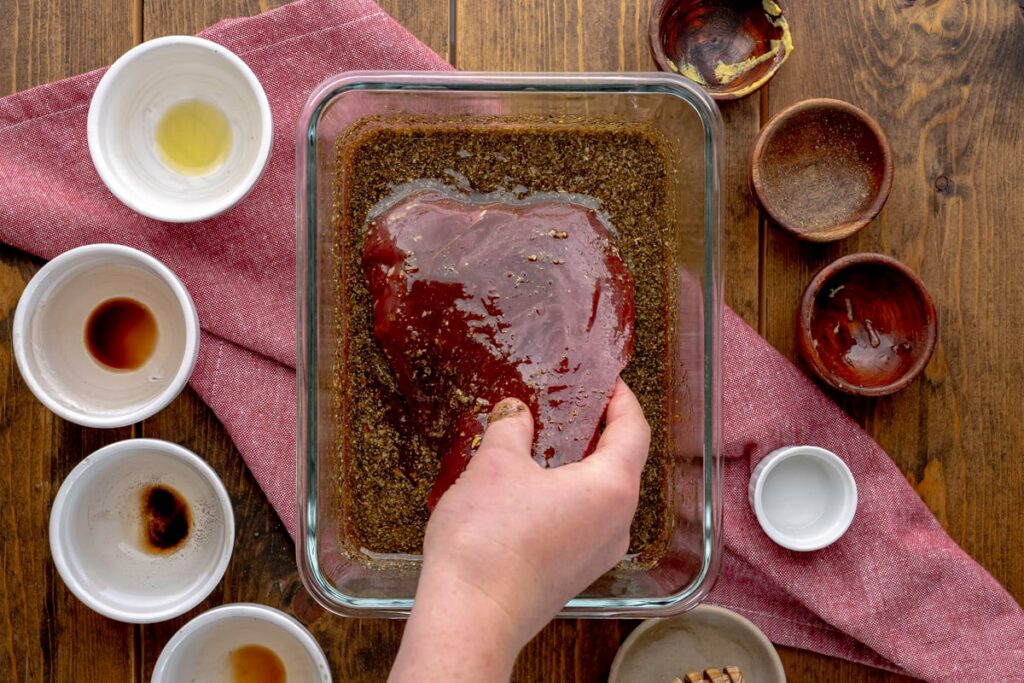
Marinating Deer Meat Recipe
Venison is naturally leaner than most other meats, which can make it tough. Marinating it is therefore a key step in preparing it.
There are several benefits to marinating venison which include;
- Tenderization: Marinating venison helps break down its muscle fibers, making the meat more tender.
- Flavor Enhancement: Marinating venison helps infuse it with a variety of flavors. The longer the venison marinades, the deeper and more complex the flavors become.
- Moisture Retention: Marinating helps retain moisture during cooking, preventing the meat from drying out and ensuring a more succulent final product.
Now you know why it is important to marinate venison. Next, let us examine some tips that will help you marinate venison like an expert;
1. Use Acidic Ingredients
Ingredients like vinegar, citrus juice, or wine help break down the muscle fibers, making the meat more tender. A basic marinade typically consists of an acid (like citrus or vinegar), aromatics (onions, garlic, herbs, spices), and salt.
Depending on your location, some basic marinade for all kinds of deer meat recipes include olive oil, red/white wine, vinegar, garlic, lime, lemon, orange and herbs like rosemary or thyme.
2. Add Flavor Enhancers
Flavor enhancers are compounds that are added to enhance a food’s own natural flavor. In venison, they add depth to the marinade.
For a tasty venison, you should consider experimenting with flavor enhancers like Soy sauce, Worcestershire sauce, mustard, garlic, fresh and dried herbs, and for added flavor you can try spices like black pepper, juniper berries, and paprika.
3. Marinating Process
You have gathered the right ingredients and flavor enhancers and it is time to start marinating your meat! This process involves soaking the venison in a mixture of your chosen acidic components and flavor enhancers.
By marinating your deer meat properly, you can enhance its natural taste, ensure it remains moist during cooking, remove all potentially harmful parasites and achieve a more enjoyable dining experience regardless of the deer meat recipes you are trying.
To ensure you use your ingredients and flavors in the right proportions, consider the following techniques.
- Prepare the Marinade: Combine all the marinade ingredients in a bowl or a resealable plastic bag. Mix well to ensure the flavors are evenly distributed.
- Marinate the Meat: Place the venison in the marinade, ensuring it is fully submerged. If using a plastic bag, seal it and gently massage the meat to work the marinade into it.
- Refrigerate: Marinate the venison in the refrigerator. For the best results, let it marinate for at least 4-6 hours. For a stronger flavor, marinate overnight.
- Cook the Venison: Remove the venison from the marinade, allowing any excess to drip off. You are ready all set! Cook meat using your preferred method, such as grilling, pan-frying, or roasting.
Whether you’re preparing a quick weeknight meal or a special dinner, carefully selecting your marinade ingredients and allowing adequate time for the flavors to penetrate can ensure that your venison dishes are tender, juicy, and full of rich, delicious flavors.
Now it is time to explore some popular deer meat recipes.
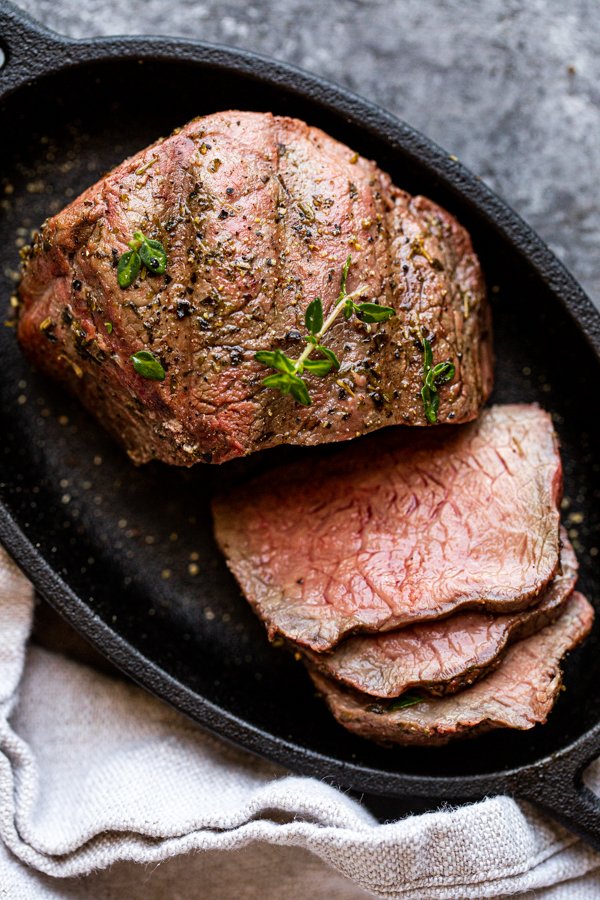
Classic Pan-Fried Venison
Pan-fried deer meat recipe is a quick and delicious way to enjoy deer meat. To get you started, here is how it’s done:
Ingredients:
- Venison steaks
- Salt and pepper
- Olive oil or butter
- Garlic (optional)
- Fresh herbs (optional)
Instructions:
- Season the Meat: Season your venison with salt and pepper on both sides. For added flavor, you can rub the steaks with crushed garlic and fresh herbs.
- Heat the Pan: Heat a frying pan over medium-high heat and add a bit of oil or butter.
- Cook the Venison: Place the venison in the hot pan and cook for 2-3 minutes per side, depending on the thickness of the meat and your preference.
- Rest and Serve: Let the meat rest for a few minutes before serving to allow the juices to redistribute.
Venison is best served medium-rare to medium to avoid drying out.
Unknown
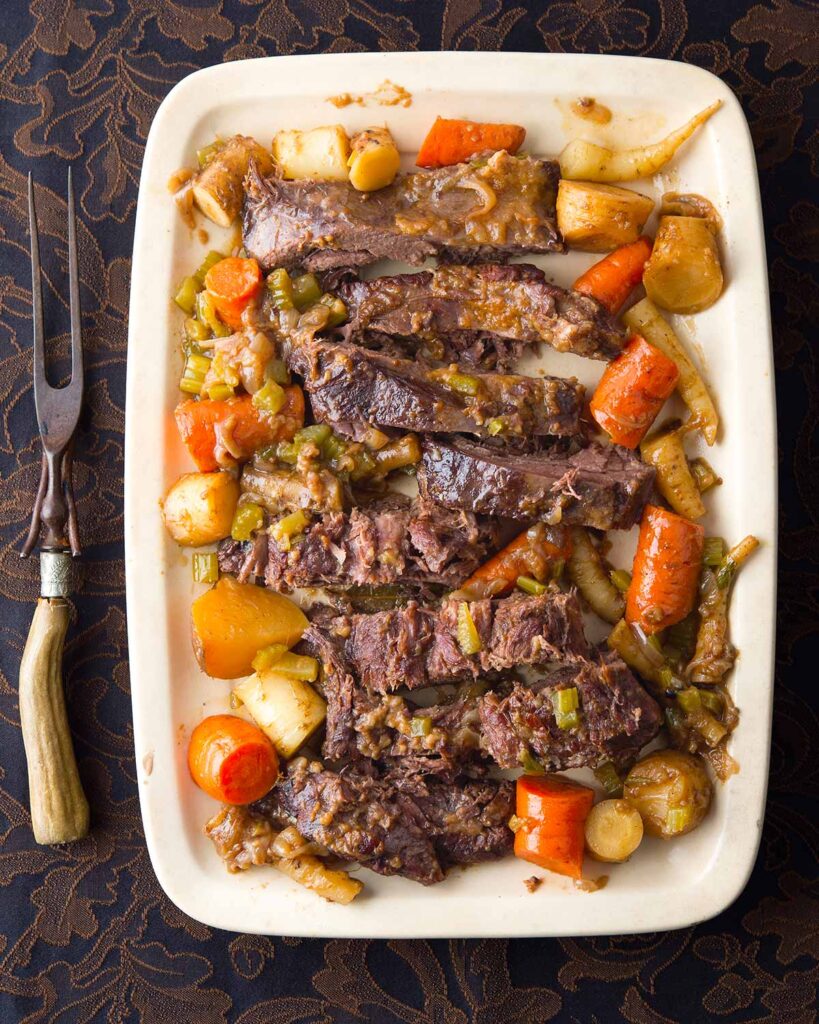
Venison Pot Roast
A venison pot roast is a comforting dish perfect for colder months. This slow-cooked recipe ensures tender, flavorful meat. Let’s learn how it is made;
Ingredients:
- Venison
- Salt and pepper
- Olive oil
- Onions, carrots, and potatoes
- Garlic
- Beef broth or red wine
- Bay leaves, thyme, and rosemary
Instructions:
- Season and Sear: Season the venison with salt and pepper. In a large pot, heat olive oil over medium-high heat and sear the venison on all sides until browned.
- Add Vegetables and Liquid: Add chopped onions, carrots, and potatoes around the roast. Add garlic, beef broth or red wine, and herbs.
- Slow Cook: Cover the pot and cook on low heat for 6-8 hours, or until the venison is tender.
- Serve: Remove the venison from the pot and slice it. Serve with the cooked vegetables and the broth.
Venison Steaks
Venison steaks are a delicious and elegant option for a special meal. Here’s a simple yet flavorful recipe:
Ingredients:
- Venison
- Salt and pepper
- Olive oil
- Butter
- Garlic
- Fresh herbs (e.g., thyme, rosemary)
Instructions:
- Season and Heat: Season the venison with salt and pepper. Heat oil in a pan over medium-high heat.
- Cook the Venison: Add the venison to the skillet and cook for 3-4 minutes per side, depending on thickness. For added flavor, add a knob of butter, crushed garlic, and fresh herbs to the pan while cooking.
- Serve: Allow the steaks to rest for a few minutes before serving.
Venison Vegetable Soup
This deer meat recipe combines tender chunks of venison with vegetables, all simmered together in a savory broth.
It’s perfect for a cold day or when you need a satisfying meal that’s rich in flavor and nutrients.
Ingredients:
- 1 lb ground venison
- 1 large onion, chopped
- 2 cloves garlic, minced
- 2 carrots, sliced
- 1 can (14.5 oz) diced tomatoes
- 4 cups beef broth
- 2 cups water
- 1 cup green beans, chopped (optional)
- 1 cup corn kernels (optional)
- 1 cup potatoes, diced
- 1 tsp dried thyme
- Salt and pepper to taste
- Olive oil
Instructions:
- Brown the Venison: In a large pot, heat a bit of oil over medium heat. Add venison and cook until browned. Remove the venison and set aside.
- Cook the Vegetables: In the same pot, add a bit more olive oil (if needed). Add the chopped onion, garlic and carrots. Cook until the vegetables are softened.
- Combine Ingredients: Add the browned venison back to the pot. Pour in the beef broth, water, and diced tomatoes. Stir to combine.
- Simmer: Add the green beans, corn, and potatoes and leave to simmer. (Optional step)
- Seasoning: Season with thyme, salt, and pepper. Bring the soup to a boil, then reduce the heat and let it cook for about 30-40 minutes, or until the vegetables are tender.
- Serve: Taste and adjust seasoning as needed before serving.
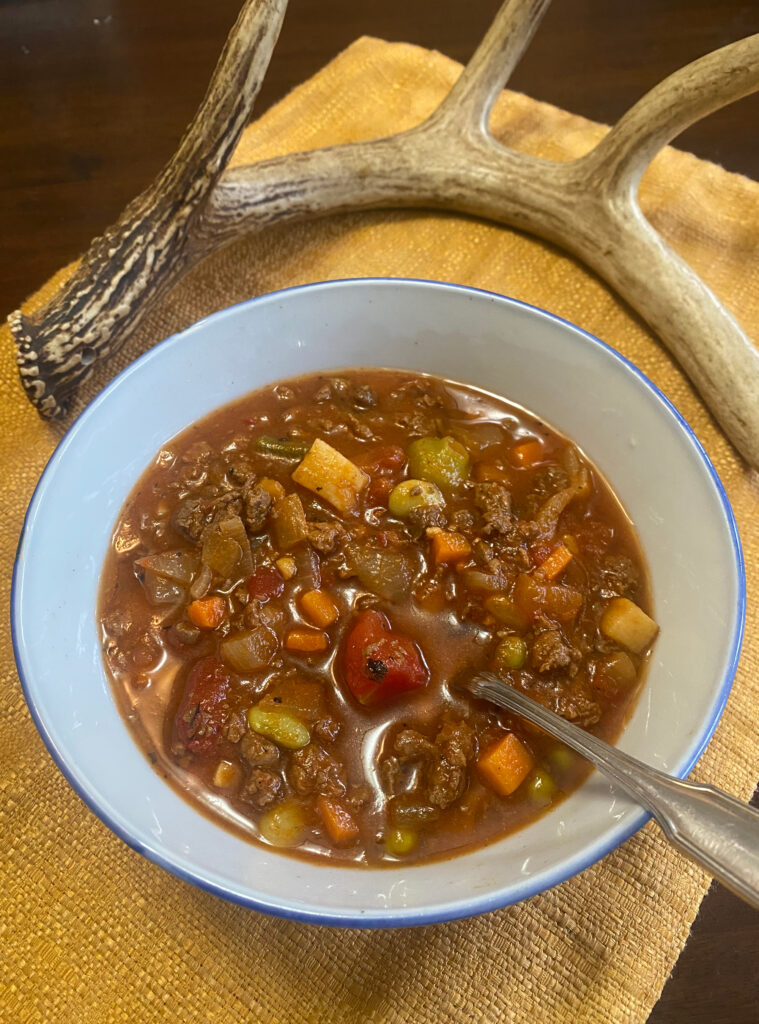
Venison Stew

Ingredients:
- 2 lbs venison, cut into cubes
- 2 tbsp flour
- Salt and pepper to taste
- 2 tbsp oil
- 1 large onion, chopped
- 2 cloves garlic, minced
- 4 cups beef broth
- 4 large carrots, sliced
- 2 tbsp tomato paste
- 2 bay leaves
- 1 tsp dried thyme
- 1 tsp dried rosemary
Instructions:
- Prepare the Meat: In a large bowl, toss the venison cubes with flour, salt, and pepper until well coated.
- Brown the Meat: Heat the olive oil in a large pot over medium-high heat. Add the venison and cook until browned on all sides. Remove the meat and set aside.
- Cook the Vegetables: In the same pot, add the chopped onion and garlic. Cook until softened. Add the tomato paste and cook for another minute.
- Combine Ingredients: Add the browned venison back to the pot. Pour in the beef broth and red wine (optional). Stir to combine.
- Add Vegetables and Herbs: Add the carrots. Season with bay leaves, thyme, and rosemary. Bring to a boil, then reduce the heat and let it simmer for about 1.5 to 2 hours, or until the meat and vegetables are tender.
- Serve: Taste and adjust seasoning as needed before serving.
Venison Meatballs
The deer meat recipe for meatballs are just what you need, anytime of the year. You can enjoy them as appetizers, main courses or even sandwiches. Let’s learn how it is made:

Ingredients:
- 1 lb ground venison
- 1/2 cup breadcrumbs
- 1/4 cup grated Parmesan cheese
- 1 egg
- 2 cloves garlic, minced
- 1 tsp dried oregano
- 1 tsp dried basil
- Salt and pepper to taste
- Olive oil
Instructions:
- Mix Ingredients: In a large bowl, combine the venison, breadcrumbs, Parmesan cheese, egg, garlic, basil, salt, and pepper. Mix until well combined.
- Form Meatballs: Shape the mixture into meatballs, about 1 inch in diameter.
- Cook the Meatballs: In a large pan, heat a bit of olive oil over medium heat. Add the meatballs and cook until browned on all sides and cooked through, about 10-12 minutes.
- Serve: Serve the meatballs with your favorite sauce (Don’t forget to add your favorite appetizer!)
Ground Venison Chili
Ingredients:
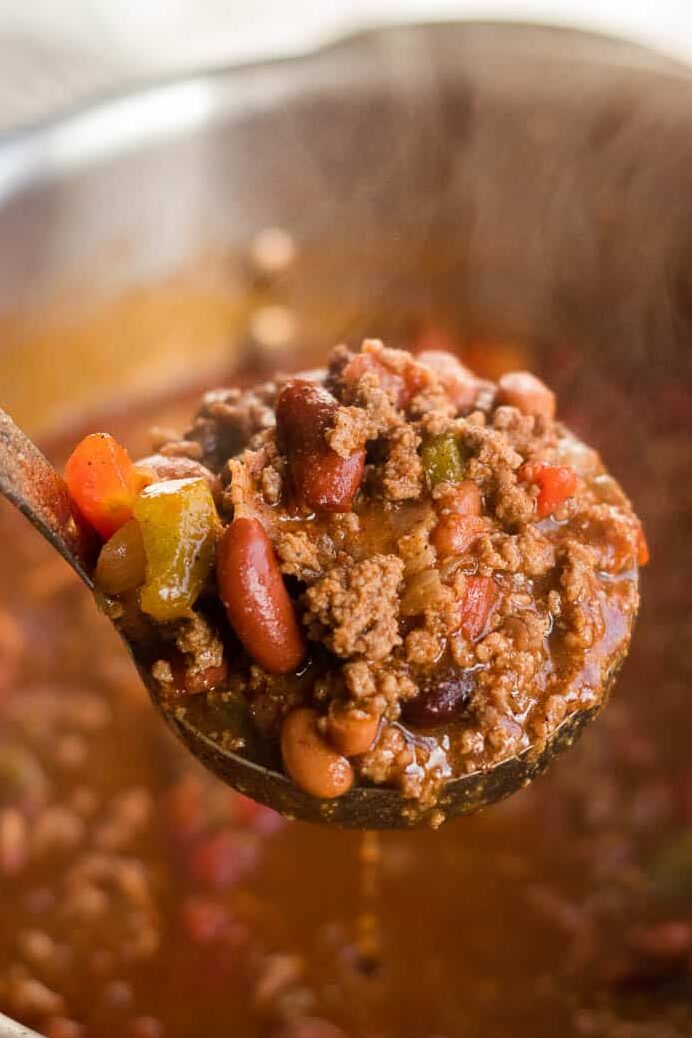
- Ground venison
- Onion, chopped
- Bell pepper, chopped
- Garlic cloves, minced
- Chili powder
- Cumin
- Diced tomatoes
- Tomato sauce
- Kidney beans, drained
- Salt and pepper
Instructions:
- Cook the Venison: In a large pot, cook the ground venison over medium heat until browned. Drain any excess fat.
- Add Vegetables: Add the chopped onion, bell pepper, and garlic to the pot. Cook until the vegetables are softened.
- Season and Simmer: Stir in the chili powder and cumin. Add the diced tomatoes, tomato sauce, and kidney beans. Season with salt and pepper. Bring to a boil, then reduce the heat and let it simmer for 30-45 minutes.
- Serve: Ladle the chili into bowls and serve with your favorite toppings, such as shredded cheese, sour cream, and chopped green onions.
Tips from the Pros
- Don’t Overcook: Venison is lean and can dry out quickly. Aim for medium-rare to medium doneness to keep the meat juicy.
- Rest the Meat: After cooking, let the venison rest for a few minutes. This allows the juices to redistribute, resulting in more flavorful and tender meat.
- Use Complementary Flavors: Venison pairs well with robust flavors like juniper berries, red wine, garlic, and rosemary. Don’t be afraid to experiment with different herbs and spices.
Your Journey to Cooking Venison Like A Pro Begins!
Cooking venison offers a delicious and healthy alternative to traditional meats. It can also be a rewarding experience when done right.
With these deer meat recipes, you can enjoy the rich taste and health benefits of venison while impressing your family and friends with your culinary skills.
Experiment with these different deer meat recipes and in time, you will discover your favorite ways to cook venison. Now, you are well on your way to becoming a professional chef!
]]>