Do you know that, with the right materials and expert guides, you can craft an all impressive antler pumpkin for Halloween? Yes, you can and you need no professional skills.
Anyone can craft a perfect and preferred antler pumpkin when guided right. In this post you will discover valuable approved tips to enable you to create a rustic masterpiece to impress your guests and bring a touch of nature to your decor.
What Is Deer Antler Pumpkin Carving
Deer antler Pumpkin Carving is a unique activity that can transform a pumpkin into a stunning and warmth display, it blends nature and art and the outcome is always beautiful.
This is a creative twist on traditional carving, it has gained popularity because it adds a natural, woodsy touch to seasonal décor, which is perfect for autumn and outdoor-inspired themes.
Essential Materials Needed For A Successful Deer Antler Pumpkin Carving
To perfectly craft your own antler pumpkin, you need some basic tools and materials. These materials will help you achieve success.
- Pumpkin
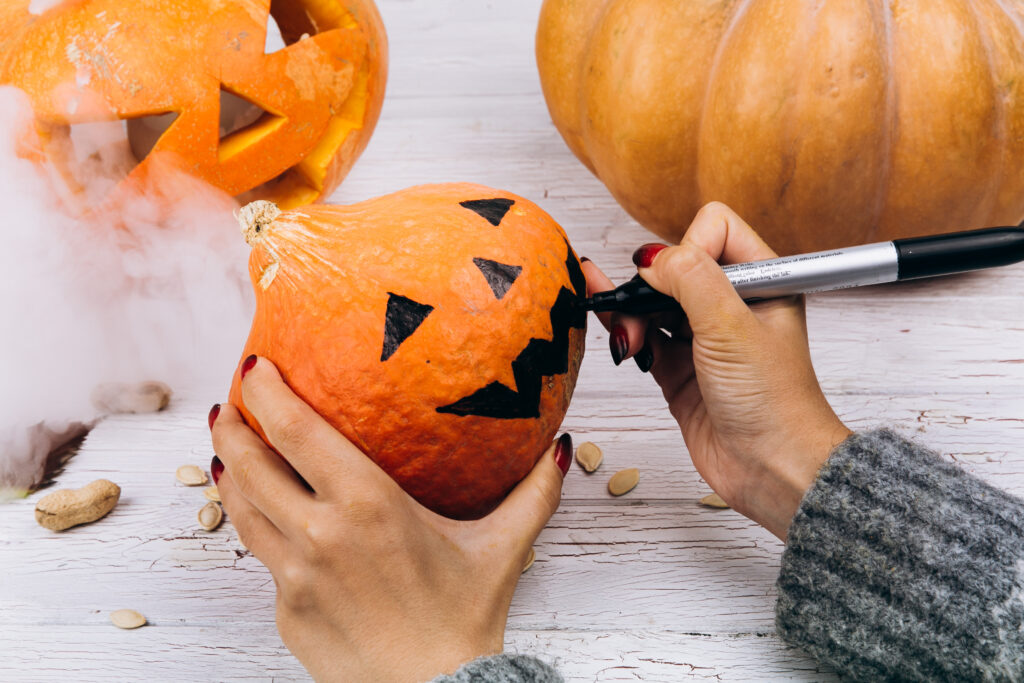
Pumpkins can not be excluded in necessary materials for deer antler carving.Choose a medium large pumpkin that has smooth surfaces. It enhances easy carving and produces a shape that complements the deer antler design.
A pumpkin tool set is needed to achieve the best pumpkin design. The carving kit, consider tools that contains these key materials
- Pumpkin scraper: It is used for cleaning the inside of the pumpkin
- Pumpkin carving saws: Utility saw for broad cuts and Detail saw for cutting intricate areas like sharp angles and curves.
- Etching tool: Useful in adding fine details to the craft.
- Stainless steel and storage bag.
- Stiff Metal Spoon
It is necessary to scrape out the interior of the carving face to a relatively thin, even thickness before you start carving. Plastic spoons might not give you the best results. It is good to get a stiff and metal spoon to aid this adventure.
- Stencils/Template
In crafting a deer antler pumpkin carving, it is necessary to have a stencil to ensure accuracy in your design.You can download a deer antler stencil in PDF format, which you can print and use as a guide for carving.
- An X-Acto Knife
An X-Acto knife is sharper and the set is the best way to do ultra-fine work, like hair, eyes, wrinkles, or teeth on your design.
- Plastic wrap
Pumpkins start losing moisture as soon as you cut them open. As the pumpkin loses water, its structure collapses, causing droops and wrinkles in your design. Your perfect craft can turn miserable in 24 hours without a wrap.
It is highly recommended to use plastic wrap to hold the stencil in place when you are carving. This will perfectly transfer the design onto the pumpkin.
- Marker or Pen
It is good to sketch your design on the pumpkin with a washable marker or pencil to view your design before you start crafting. This will help trace the template and avoid mistakes.
Additional tools include Paper towel or cloth for cleaning and Led Light for illumination.
Explore these essential pumpkin carving toolkit for my information
The 9 Expert Approved Tips/Guides For Deer Antler Carving.
- Gather all carving tools
The first tip to carving the perfect deer antler pumpkin is to gather the right tools that you will use for the activity. Ensure to have all the tools listed above functionable.endeavor to use quality tools especially a complete carving kit.
- Choose the right pumpkin.
The right pumpkin has a direct influence in making your design appealing or not appealing.
Pumpkins with a sturdy stem and thick walls are best options for carving a great antler design, such are less likely to collapse or deteriorate quickly. Consider a round large pumpkin with a smooth surface.
- Set Up A Clean Workspace.
Pumpkin carving comes with some mess,and it is necessary to manage and keep your workspace organised. To ensure this, you can prepare your carving area with trash bags and tools.
- Use A Stencil/Template.
One tip to perfect your deer antler pumpkin carving is to always have an outline before you commence the crafting activity. The deer antler stencil can provide a use outline to guide the outline. With the template, you can pre sketched your design on a paper before crafting it on the pumpkin.
After sketching, try to outline your design with washable marker or pencil to lightly sketch the antlers on the pumpkin’s surface and ensure it meets your preferences before cutting.
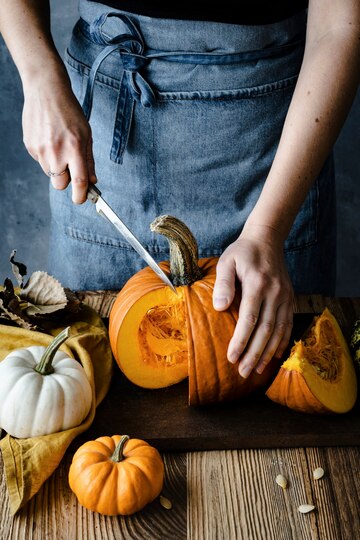
- Now carefully gut the Pumpkin
Use a large pumpkin saw or a kitchen paring knife. It is always good to cut the top of the pumpkin and make sure that you angle the knife towards the centre of the pumpkin, so the lid won’t fall in when it has been cut loose.
You can also start cutting from the button pumpkin’s which can preserve the pumpkin shape and makes it easier to place a light source inside without compromising.
Cut the main outline of the antlers first and gradually the intricate details.
- Add Detailing To The Antlers.
Adding these features aims to mimic the look of real antlers, you can use a Dremel tool or X-Acto knife to carve textured grooves, ridges, and slight nicks for a perfect outcome. Rougher texters create and give a natural look to the design.
- Hollow Out The Pumpkin Fully And Maintain Thin Walls
Ensure to carefully scoop out the insides of the pumpkin thoroughly, especially around the carved sections.
Remove all excess pulp and seeds to allow light to shine through the carved areas. thin the walls of the pumpkin to about 1/2 inch thick after cleaning the insides. Thai makes it easy to shine through your carving designs.
- Illuminate Your Design With Lightning
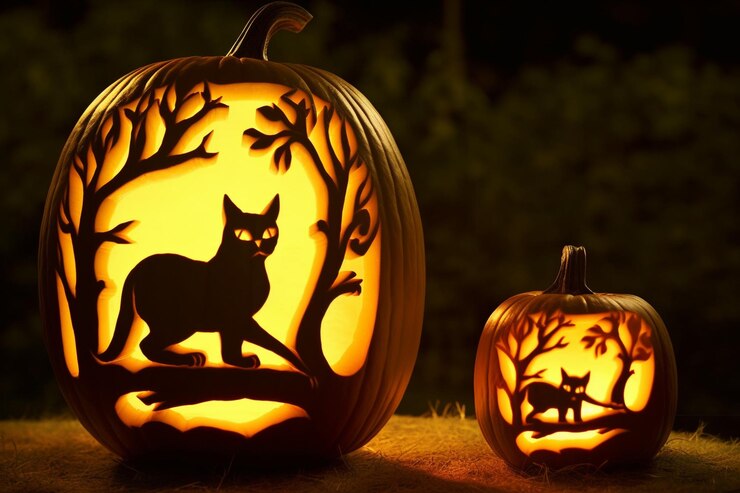
Lightning enhances the carved antlers’ look, you can place lace LED lights inside the pumpkin to create the best glow and you will admire your design. Avoid candles to prevent heat and damages.
- Ensure To Preserve And Keep Your Pumpkin Safe.
Store and keep the pumpkin in a cool place to delay it from decay. You can keep it hydrated by spritzing it with water occasionally or apply a spray sealant or coat the edges of the carved areas with petroleum jelly.
Let’s wrap up.
Now, deer antler pumpkin carving has been simplified. You can create your desired and eye catchy designs, just carefully follow these tips. Do not be afraid to exhibit your artistic skills with different styles that reflect your taste.
Try out your design and come back to share your results in the comments section or on the deer hunting gateway.
You can watch this YouTube video on Pumpkin carving tips and tricks for more insights.
]]>“In nature, nothing is perfect and everything is perfect. Trees can be contorted, bent in weird ways, and they’re still beautiful.” – Alice Walker
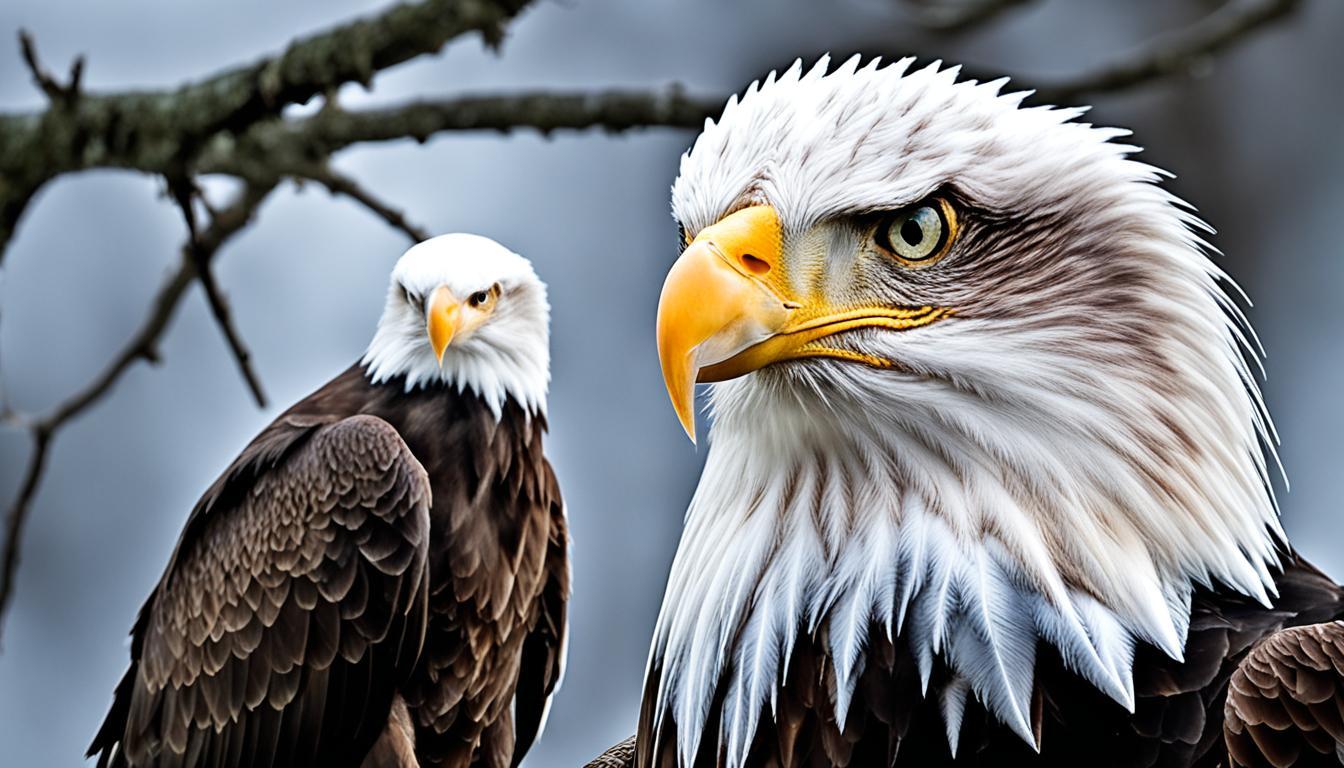
Gregory Smolin is a photographer who knows birds and landscapes well. He says knowing your subjects is key to great wildlife shots. This helps you guess their actions and find the best focal length shots.
It doesn’t matter if you use a fancy camera like Smolin’s Sony a7Riii or your smartphone to shoot wildlife. The main thing is to improve your observation skills and avoid camera shake. While you let the camera do the work, you’ll need patience, fast thinking, and a love for nature.
Are you ready to start? Let’s look at some key tips for wildlife photography to get those good photos.
Understanding Wildlife Photography Basics
Wildlife photography combines art and science. It lets you take amazing photos of animals in their natural settings. You must know about animal behavior, their homes, and how to photograph them ethically.
Knowing Your Subjects and Their Habitats
To take a photo; I mean take great wildlife photos, do your homework. Learn about the animals you want to photograph. Understand their habits, where they live, and what they do every day.
This information helps many wildlife photographers guess their actions and find places to take great photos or better images.
Essential Equipment for Wildlife Photography
Even if you’re a beginner wildlife photographer, in getting the right gear to capture wildlife, you’ll need:
- A weather-sealed camera body
- Telephoto lenses (300mm to 600mm)
- Sturdy tripod or monopod
- Fast memory cards
- Extra batteries
Importance of Patience and Observation
When it comes to wildlife photography you’ll need a lot of patience. Moving animals won’t pose for you. You might wait for hours for the perfect shot. You’re using this time to watch and learn. In professional wildlife photography, silent shutter mode helps you not scare your subjects.
“The best wildlife photographers are those who can think like the animals they’re photographing.”
Remember, it’s important to photograph wildlife ethically. Keep a safe distance, don’t harm their homes, and never use bait. To get great photos of animals, aim to capture real behavior, not fake scenes. With patience and respect, you can usually take several stunning photos that show the wild world’s beauty.
Let’s now look at the tips for wildlife photography that can greatly impact your images.
Choosing the Right Camera and Lenses
Finding the right gear is crucial for your wildlife photos to look good. The camera and lenses you choose can greatly improve your wildlife photography and allow you to shoot great photos of different types of animals.
The following are tips for wildlife photography that you need to know to ensure you take stunning pictures like an experienced wildlife photographer!
Best Cameras for Nature Photography
For wildlife and landscape photography, look for cameras with high resolution, good zoom lens and good low-light performance. For the best composition, many experts prefer full-frame DSLRs or mirrorless cameras.
The Sony ⍺1 is a top pick for its speed and image quality. But depending on your camera to choose, you don’t have to spend a lot. A crop sensor camera in hand can also work well, offering more reach with your lenses.
Selecting Appropriate Lenses for Different Scenarios
The right lenses are key for wildlife photography. Here’s a quick guide:
- Wide-angle (10-35mm): Great for landscapes and environmental shots
- Standard (35-85mm): Versatile for various nature subjects
- Telephoto (70-200mm+): Perfect for distant wildlife
For wildlife, telephoto lenses are often the best choice. The Sony FE 200-600mm f/5.6-6.3 is a popular option, priced at $1998. It gives you great reach without costing too much. To shoot in low light, fast lenses with wide aperture and shutter speed like f/2.8 or f/4 work best.
Importance of Weather-Sealed Equipment
Nature can be unpredictable. That’s why weather-sealed gear is essential. It keeps the camera and lenses safe from dust, moisture, and other outdoor challenges. This feature lets you shoot in tough conditions, making sure you don’t miss that perfect shot.
Remember, good camera settings for wildlife are just as important as your gear. Practice with your equipment to find the best settings for different situations. With the right tools and knowledge, you’ll be taking amazing wildlife shots in no time.
Tips for Wildlife Photography
Mastering wildlife photography takes time and practice. Start by understanding the animals to get the best photographs. Learn about animal behavior and where they live. This helps you get the best shots when photographing the animal.
For birds in flight, keep your shutter speeds at 1/500th or higher. This freezes their movement and makes your photos sharp. With mammals, be patient. Watch their behavior, prepare your lens and camera and wait for the perfect moment to snap a photo.
Storytelling through wildlife images is key. Don’t just take close-ups. Include the animal’s surroundings to tell a story. Try different angles to make your photos more interesting.
- Use the golden hours for soft, even lighting
- Shoot in continuous mode to capture fleeting moments
- Frame subjects off-center for dynamic compositions
- Get low for dramatic perspectives
Remember, ethical wildlife photography is important. Observe wildlife well, never disturb animals for a photo. Increase the length of your lens and keep a respectful distance. By following these tips for wildlife photography, you’ll get better pictures that tell powerful stories.
“The eyes are the windows to the soul in wildlife photography. Focus on capturing them to create engaging images.”
Mastering Camera Settings for Wildlife Shots
Getting your camera settings right is key to great wildlife photos. Let’s explore the main settings you need for amazing wildlife shots.
Aperture and Depth of Field
Aperture is vital in wildlife photography. For clear, detailed shots, use an aperture between f/5.6 and f/8. This keeps the animal looking sharp and the background soft. In bright light, a higher f-stop helps avoid overexposure and sharpens focus.
Shutter Speed for Capturing Movement
Your shutter speed can freeze or blur motion. For flying birds, set it to 1/2000th of a second. Fast-moving animals like deer need 1/1000th to 1/1600th. For still wildlife, 1/500th is enough.
ISO and White Balance Considerations
ISO is crucial in low light for wildlife. Keep it low (100-200) in bright conditions for clear photos. Set a maximum iso to 400-800 as light fades. In very dark scenes, go up to 1600 or higher. You can fix noise later in editing.
“The right settings can turn an ordinary wildlife shot into something extraordinary.”
Try these camera settings for wildlife. Practice in various lighting and with different subjects. Soon, you’ll be capturing nature’s beauty like a pro!
Composition Techniques for Stunning Nature Images
Wildlife photography composition is crucial for making images that tell a story. The rule of thirds is a great tool. Picture your frame split into nine parts by lines. Place your subject where these lines meet for a balanced shot. This method helps create images that grab the viewer’s attention.
Storytelling in wildlife photos is more than just showing the animal. Add depth with foreground elements. Use wide apertures (f/2.8 or f/4) to show the setting and mood. Negative space can show freedom and exploration, especially in big landscapes. The background is as important as the subject. A clean background makes your subject stand out and boosts your image’s impact.
Always put ethical wildlife photography first. It’s tempting to get close for a great shot, but keep a safe distance. This avoids disturbing the animals and their homes. Use long lenses for close shots without disturbing them. Shooting at eye level with your subject builds a connection with the viewer. These tips for wildlife photography ensures you approach nature with respect and helps wildlife conservation efforts.
Start Your Journey
Wildlife photography is a journey into the heart of nature’s untamed beauty. By mastering the interplay of essential equipment, you can capture stunning images that tell compelling stories.
Take these tips to heart and elevate your picture capturing skills!
]]>